
Web Testing with Testsigma
With paced advancement towards Automation, organizations are bound to shift their focus from manual testing to Automation testing. The biggest challenge faced in this cultural shift is firstly, to change the mindset of employees and secondly tool selection. Both concerns can be solved if we select a tool that is easy to understand, does not involve much programming, and can automate all our required tasks.
In this blog, we would be discussing how to test web applications via Automation using the Testsigma tool. We will illustrate each step and how it simplifies the automation job for a tester who does not have a coding language background.
Testsigma is a cloud-based continuous testing tool used widely in DevOps and Agile Methodology. The tool uses artificial intelligence at its core for automation, execution, and maintenance of tests. Automation test cases are written in the normal English language which makes it easy to understand for everyone.
Here is a step by step guide to successfully perform web application testing using Testsigma tool.
Create a project
Create a project under Testsigma. This project will be responsible to hold all test cases to test requirements about the project.
Under project Create Test case
The Test case should be crisp and clear. Each test case should be designed in such a way that each step has an objective to fulfill and serves your purpose.
We would be taking a small example where a user has to register on a site.
Test case–
Step 1: Hit URL – https://rahulshettyacademy.com/angularpractice/
Step 2: Enter First name
Step 3: Enter Email
Step 4: Enter Password
Step 5: Select Employment status
Step 6: Enter Date of birth
Step 7: Click submit
Step 8: Verify Successful registration
Each field on the web page is known as web elements. Each web element has a unique locator that helps trace the field and enter values into it. The data in the fields are entered with the help of locators.
Test data to be entered in the above test case step–
Step 2: Abc
Step 3: [email protected]
Step 4: [email protected]
Step 6: 01/01/2000
Unlike other tools where you need to know proper coding to automate the web page. The test sigma tool helps you do the same in the basic English language.
Automation of above test case using Testsigma tool.
Step 1. Create a project

Step 2. Add a test case to the project by clicking on the add test case and give test case a relevant name
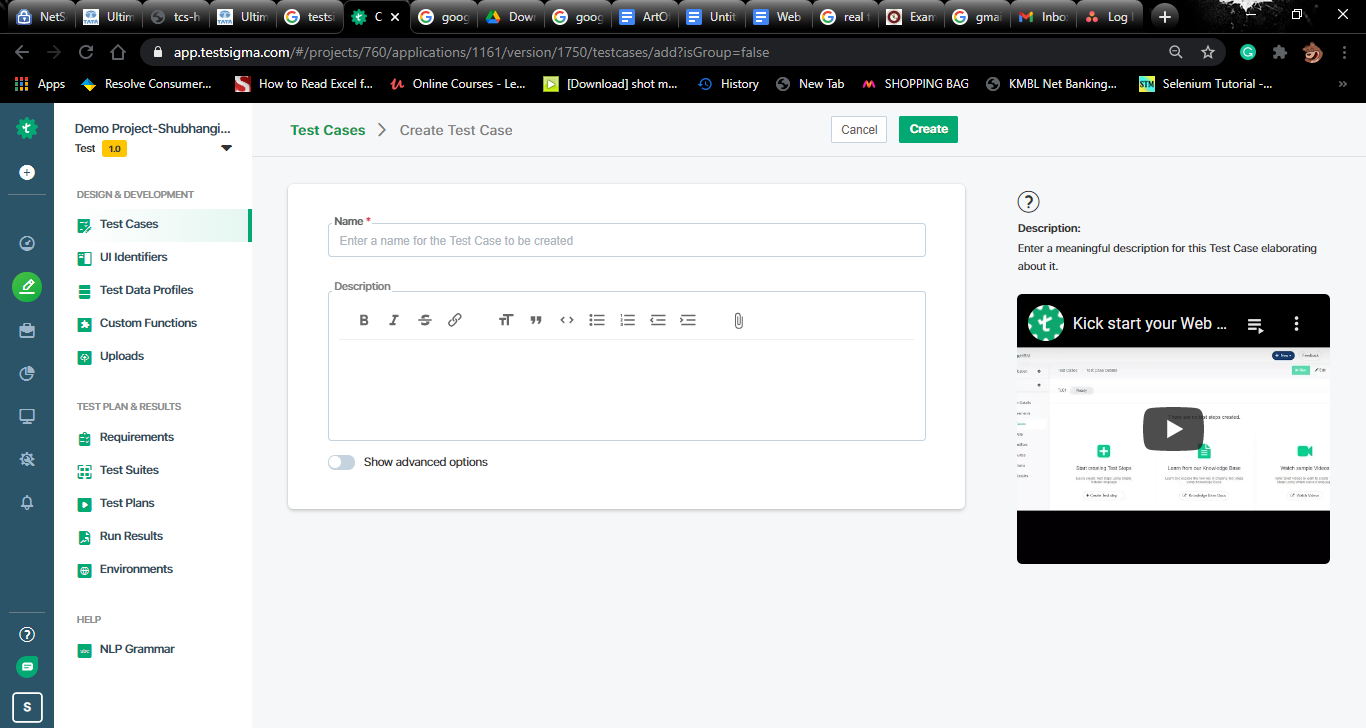
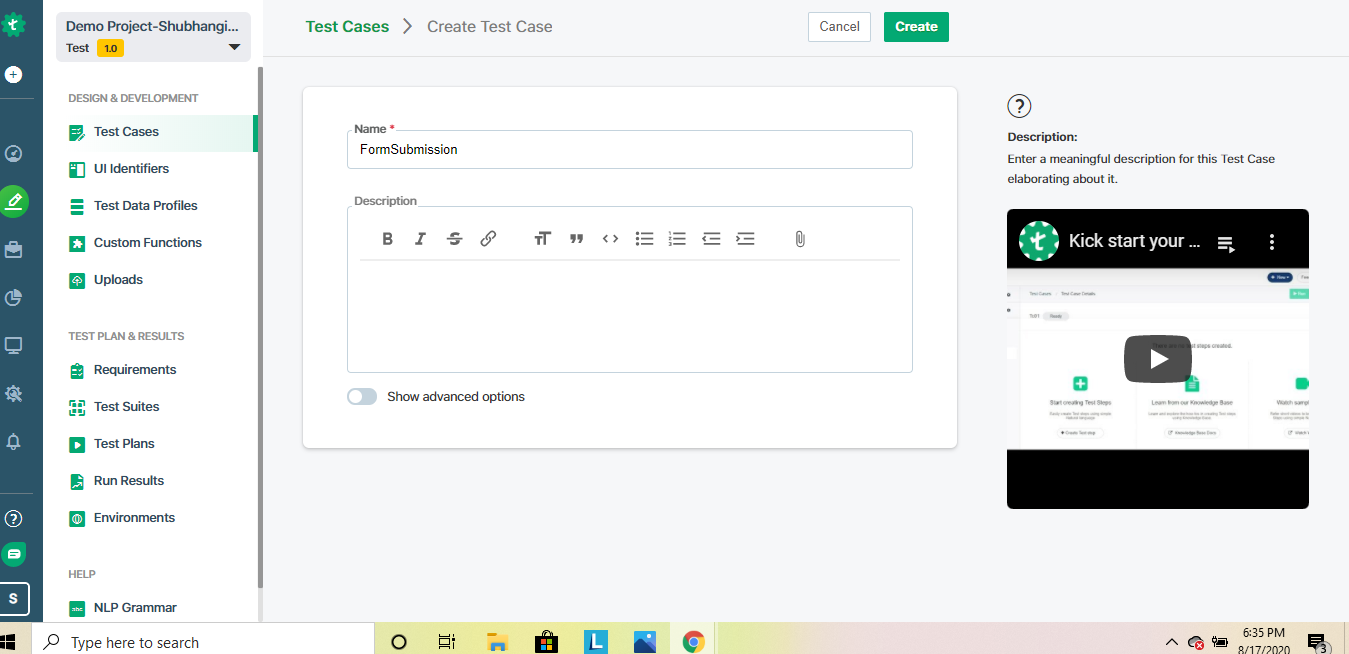
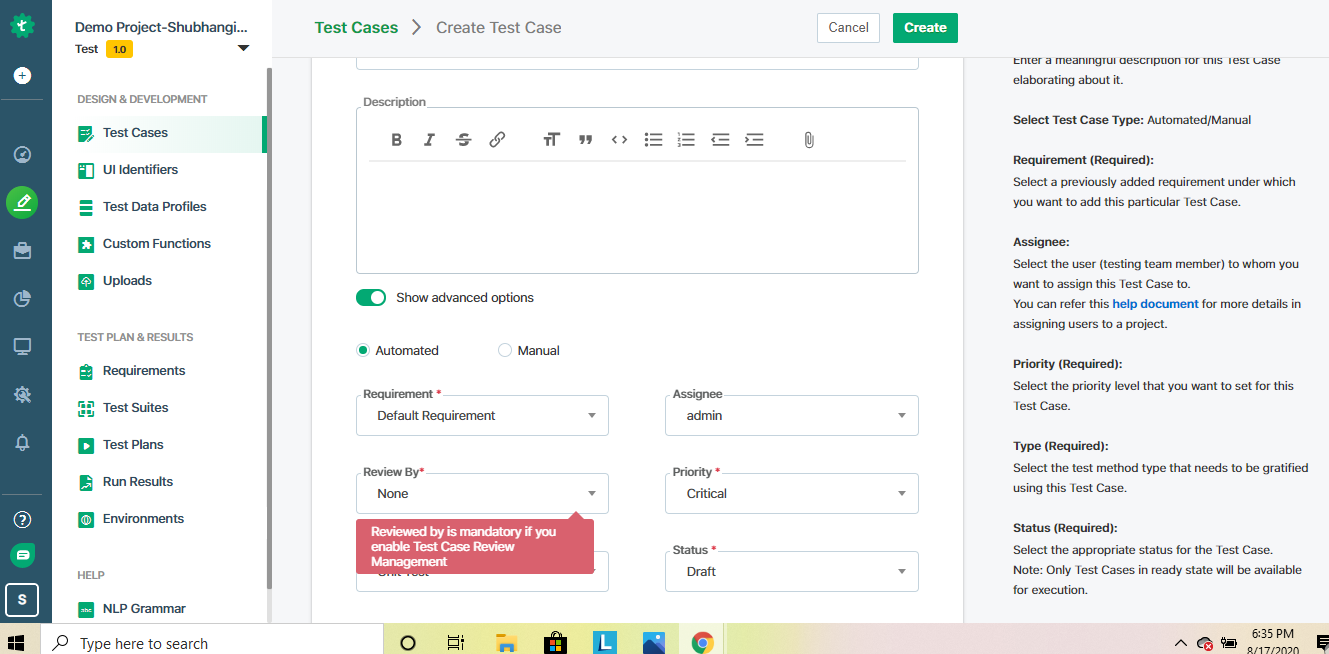
Step 3. Click on the create button and enter all details asked related to the project and verify that the test case is created.
Step 4: Capture all UI identifiers.
The web elements are termed as UI identifiers in the Testsigma tool. The UI identifier in the Testsigma tool can be located in three ways.

i. Record: The record option is one of the best features of the Testsigma tool. This option helps in extracting the location of the element on the page by just clicking on the element. The record option is unlike the record and play option it doesn’t mimic the actions it just helps in fetching the locator value.
ii. Create: You can also create your own unique UI identifiers by clicking on the create button and entering relevant UI identifiers with their values.
UI identifier is the locator value to locate that particular web element. The locator can be Classname, ID, XPath, link text, name, CSS selector. The locator can be fetched by right-clicking on the web elements and inspecting it.
iii. Import: You can also store values of UI Identifiers in the external excel sheet and import that sheet by clicking the import button and providing values of the locator in the test cases.
Step 5: Add the test step to the created test case, pass values, and get the desired objective fulfilled. Testsigma being an AI-based tool while typing in test steps it auto-suggests keyword/test steps to write that reduces the complexity of automation scripting.
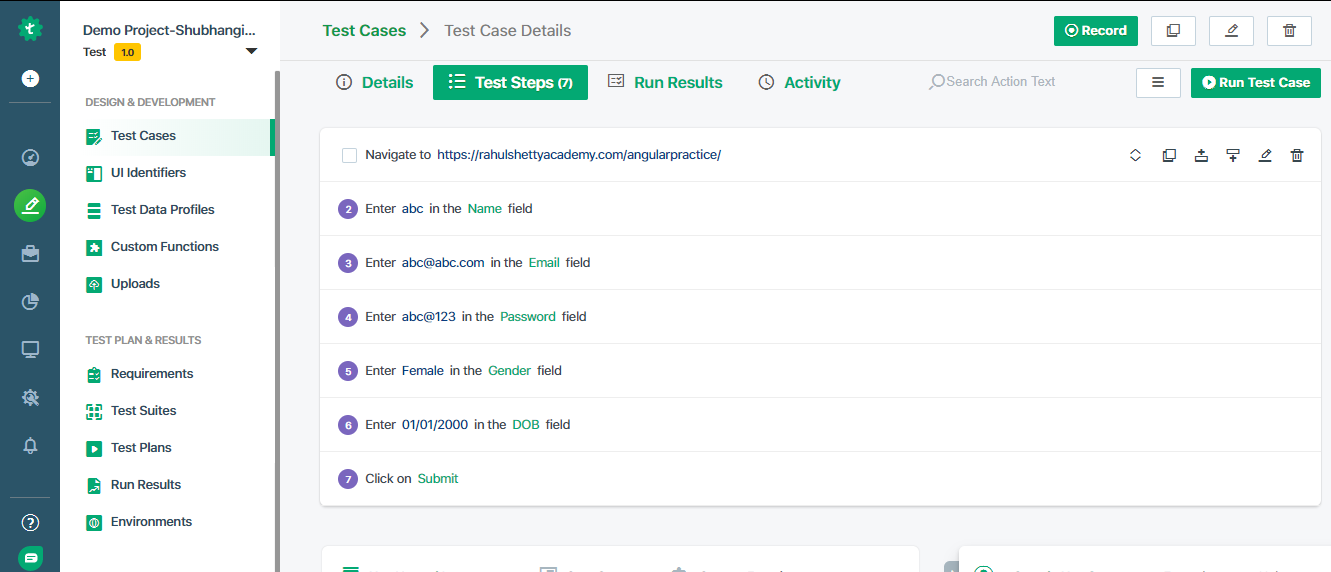
1. Navigate to https://rahulshettyacademy.com/angularpractice/ and click on create, verify that step is created.
2. Enter test data in the UI identifier field. This step is to enter values to specific web elements. The below test case is written in Testsigma to submit the registration form.
Test data can be provided while writing the step, Abc being the value to pass in Name UI Identifier. Likewise, you can pass the value in all fields.
Enter Abc in the Name field
Enter [email protected] in the Email field
Enter [email protected] in the Password field
Enter Female in the Gender field
Enter 01/01/2000 in the DOB field
Click on Submit
3. Click Submit – perform the action
Test execution
Test execution is to verify that the expected and desired outcome is the same. Testsigma has a powerful inbuilt cloud-based test execution tool that helps you run test scripts on multiple platforms. To enable test execution via the Testsigma tool you just need to install the plugin.
As soon as you click on the run test case button a window will popup. This enables you to select the test lab where you want to run your case, the Operating system, the browser, version of the browser, the capability to save the screenshot for each step.
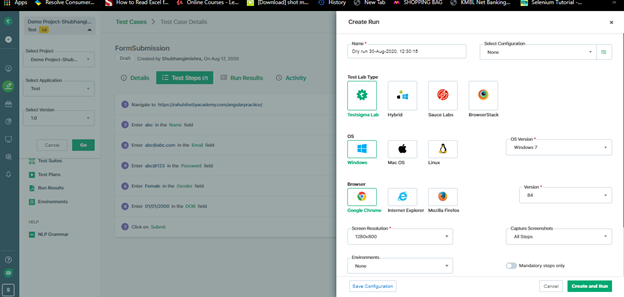
Running in different browsers and operating systems
The test execution tool of Testigma allows you to run your test scripts on multiple browsers and operating systems. This can be done by just clicking on the browser and operating system of your choice during runtime.
This feature makes the execution simple and hassle-free. You do not have to download any drivers for the browser nor do you have to work on VM ware to execute test cases on multiple platforms.
The Operating systems supported by the Testsigma tool are Linux, Windows, and Mac.
It allows executing test cases on multiple browsers and mobile devices such as Chrome, Firefox, and internet explorer.
Analyzing the result of test case run with Testsigma tool
When test execution is completed, the screen will be displayed with the test result. The biggest feature of the Testsigma execution tool is that it not only captures screenshots but also makes the video of the entire test run. This helps you analyze faster where the problem occurred in case of any failures.


Reporting a bug in case of failures
The result section of the Testsigma also has a feature to report a bug in case the desired results were not obtained. The report bug feature is integrated with Jira tool by default (you can also integrate it with a bug reporting tool of your choice) that helps you raise defects immediately just by providing the comments. The screenshots, logs, and video that were taken while test execution by the Testsigma tool is directly attached when reporting a bug.

The tool also provides us the capability to download videos, logs, and screenshot that can be used for future reference
Testsigma is a powerful automation tool that not only makes the task of a tester easy but also makes the automation learning job simpler for someone who is new to automation. The way the test cases are written in the Testsigma tool and reports are derived, it can help any non-technical person understand the entire requirements and its outcome. This makes it easy for business analysts, Tester, and developers to have a common understanding of the application at any given point in time. Happy testing!!!
Еще об этом:
 Manual Testing Interview Questions and Answers
Regression Testing With Testsigma
What is Automation Testing?
Types of Testing | Software Testing Types Every QA Should Know
Testsigma introduction
Shift Left Testing and Shift Right Testing Approaches
Cross-browser Testing with TestSigma
10 Best Test Management Tools For Simplified Testing
Top 10 Automation Testing Tools
API Testing with TestSigma
Manual Testing Interview Questions and Answers
Regression Testing With Testsigma
What is Automation Testing?
Types of Testing | Software Testing Types Every QA Should Know
Testsigma introduction
Shift Left Testing and Shift Right Testing Approaches
Cross-browser Testing with TestSigma
10 Best Test Management Tools For Simplified Testing
Top 10 Automation Testing Tools
API Testing with TestSigma