
Cross-browser Testing with TestSigma
Cross-browser testing is an approach that allows developers to ensure that their applications are well responsive and compatible across all types and versions of web browsers. In the past few decades, there has been a tremendous surge in the volume of content that is available and accessible across the globe. Consequently, users now have lots of options when they choose devices and browsers to surf their favorite websites. This is where the problem arises for web developers and designers.
Content
Why Cross Browser Testing?
While designing websites, developers need to ensure that their web pages are rendered equally across all browser types and versions. This is difficult because each browser has its own specifications and standards. For example, the WebM video format is not supported by Safari, while it is used heavily by Chrome and other popular browsers. If you use it on your website, then it may cause bugs to peek in when your web pages are rendered in this browser.
Hence, it becomes very important for developers to perform thorough cross-browser testing before they launch their web applications into production. Now, with the availability of such a large number of web browsers and each with different versions, it becomes very difficult to perform cross-browser testing on all these browsers manually. It’s important to know that most of the test cases in the case of cross-browser testing are repetitive in nature. And there’s a rule of thumb that says if a task is repetitive in nature, it can always be automated. The same is the case with cross-browser testing.
Cross Browser Testing With Testsigma
There are a plethora of tools that are available online that allows you to perform cross-browser testing, all with their own set of features. With the availability of such a diverse set of tools, it becomes difficult for users to find out the right tool that would cater to all their cross-browser testing requirements.
Testsigma is a cloud-based test automation tool that allows you to perform both functional and visual cross-browser testing on 2000+ real desktop, iOS, and Android browsers, available on-demand. Following are some of the features that the Testsigma tool provides that make the cross-browser testing experience easy-peasy-lemon-squeezy.
- It’s a unified platform that allows you to create scriptless test cases using natural language. You can combine them into test groups and suites to cater to specific testing requirements.
- It allows you to manage multiple browser environments and run parallel browser sessions on multiple platforms simultaneously.
- Effortless CI/CD integrations for teams to adopt agile development methodologies.
- Supports team collaborations allowing you to share resources and reports with your team members.
- Bug reporting tools to automatically report bugs with all the essential information.
- Quick actionable feedback with powerful reports enabling you to adopt a drill-down approach.
Let’s discuss a few easy steps that you can adopt to access the wide range of features provided by testsigma for both visual and functional cross-browser testing.
Steps
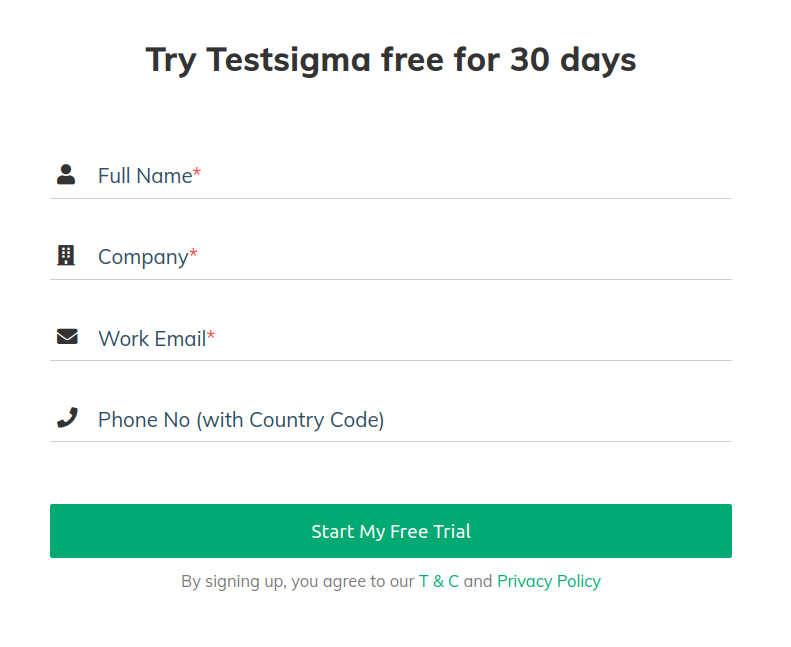
To begin your journey with testsigma, you need to have an account registered with testsigma. You can sign up for a free 30 days trial here.
Creating a Project
Once you have registered yourself with testsigma, you can move ahead and create your first project.
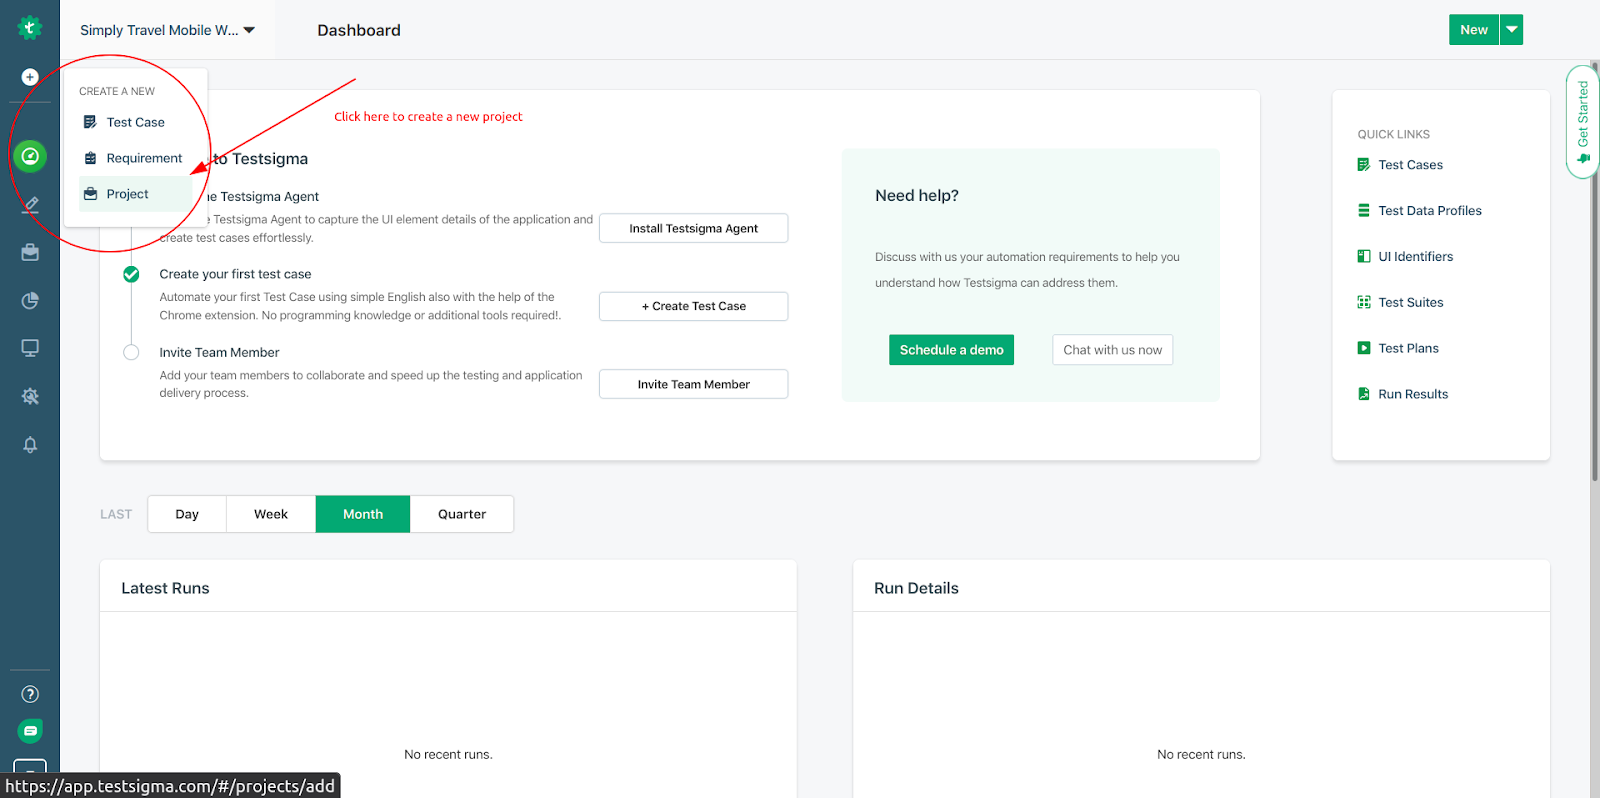
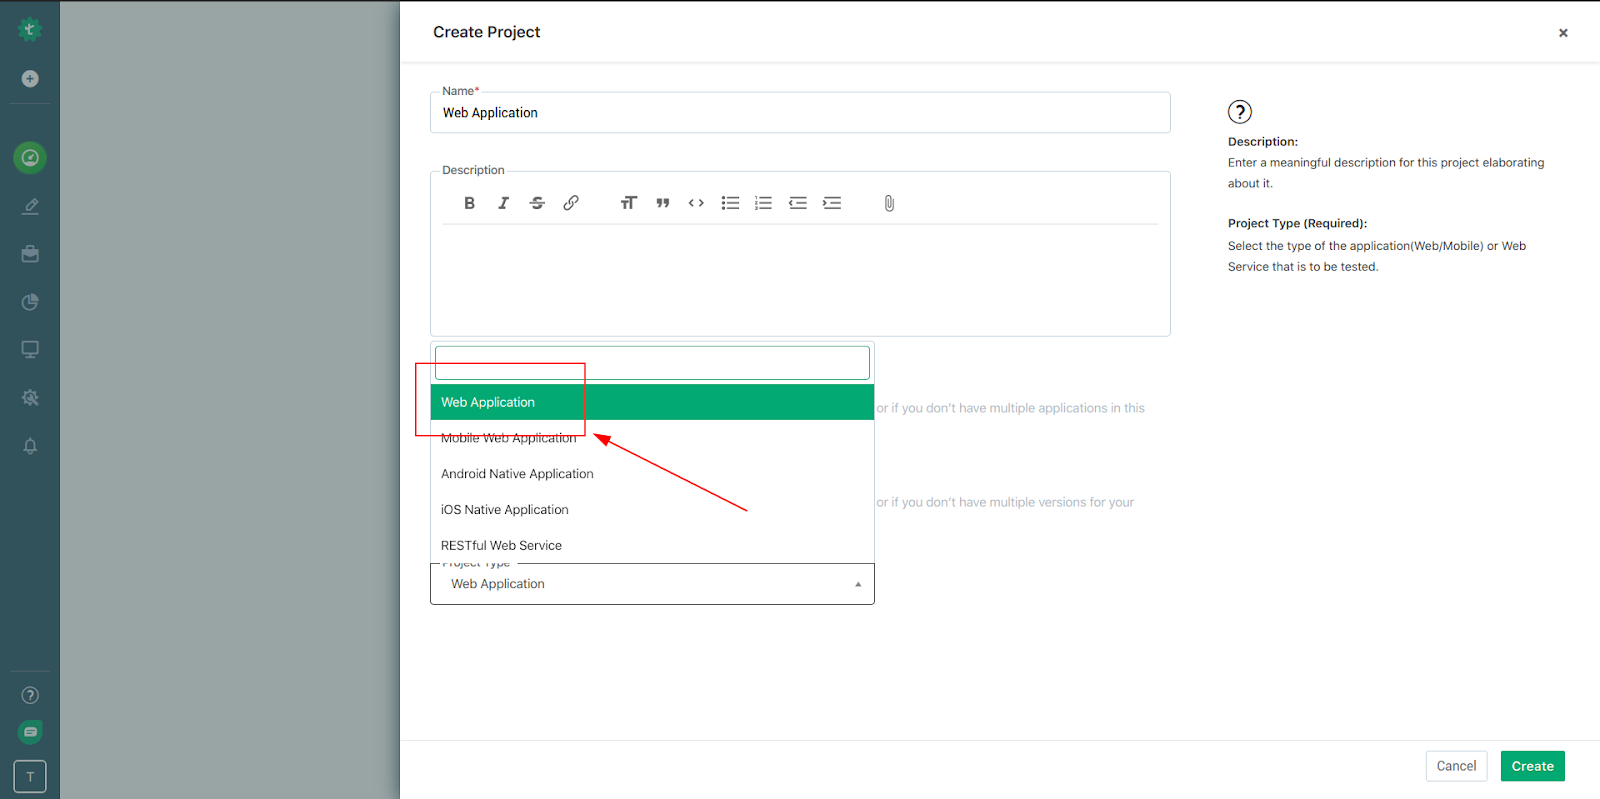
Since we want to create a project for cross-browser testing, you need to select the web application option in the project type dropdown list.
After you have entered all the relevant details and created your project, it’s time to create UI identifiers so that you can perform enhanced visual testing on all your web pages.
Creating UI Identifiers
You can create UI Identifiers either manually by including XPath or attributes of the CSS elements, or you can also record them automatically by opening the URL in Chrome browser.
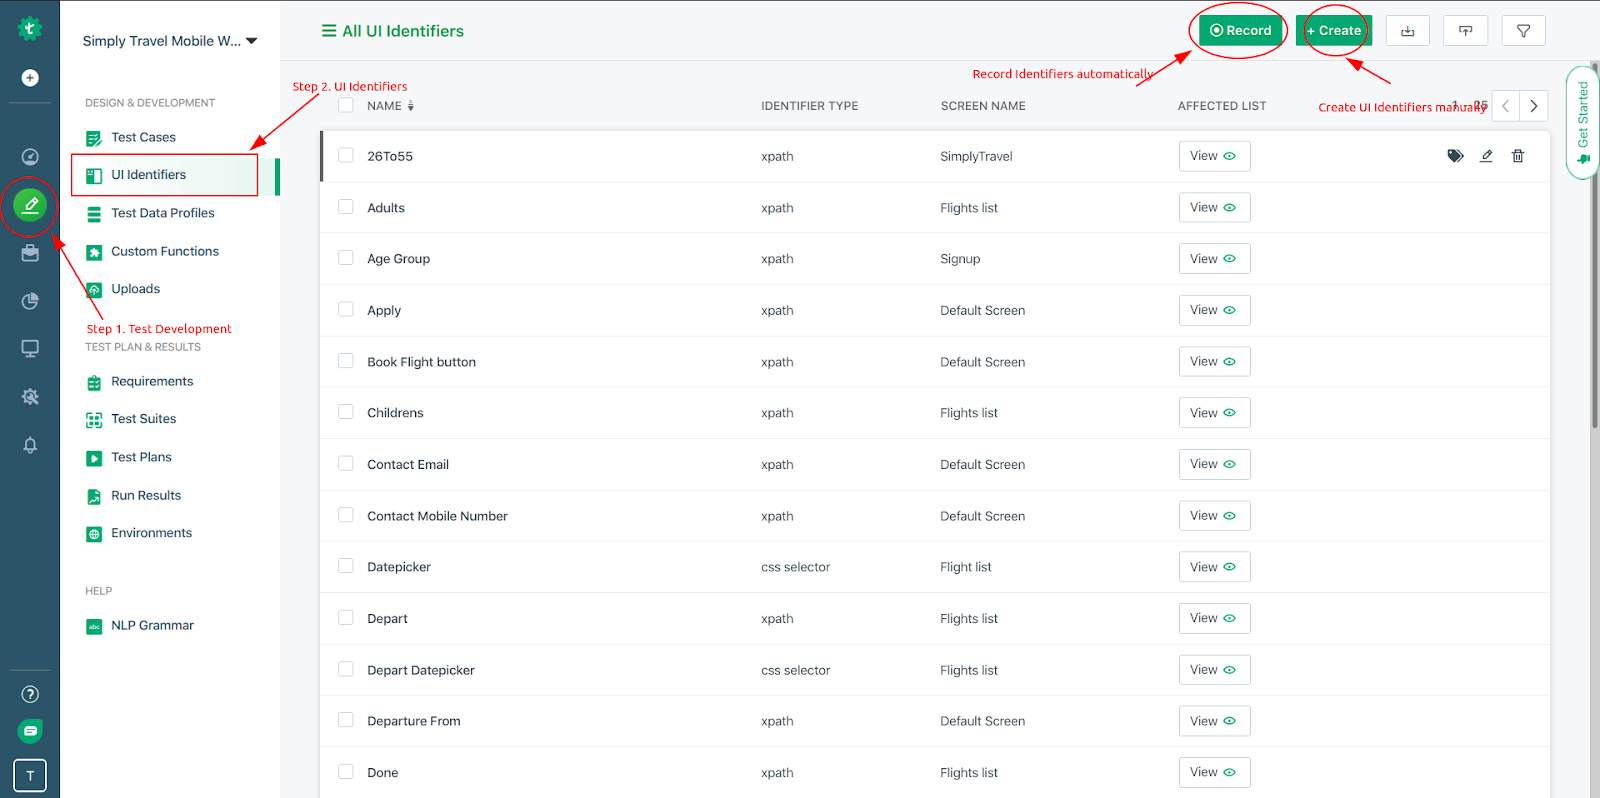
You can check the detailed guide on how to create UI Identifiers with Testsigma. Creating or importing UI Identifiers is one of the most important steps of any visual testing process. With access to appropriate UI Identifiers, you can easily embed them in your test cases and perform comprehensive visual testing on critical components of your applications. It helps you to compare them on multiple browser-OS combinations and pinpoint bugs.
Creating Test Cases
Creating test cases with Testsigma is as easy as it comes. You can use simple natural language combined with the UI Identifiers that you just created in the last step to create meaningful test steps.
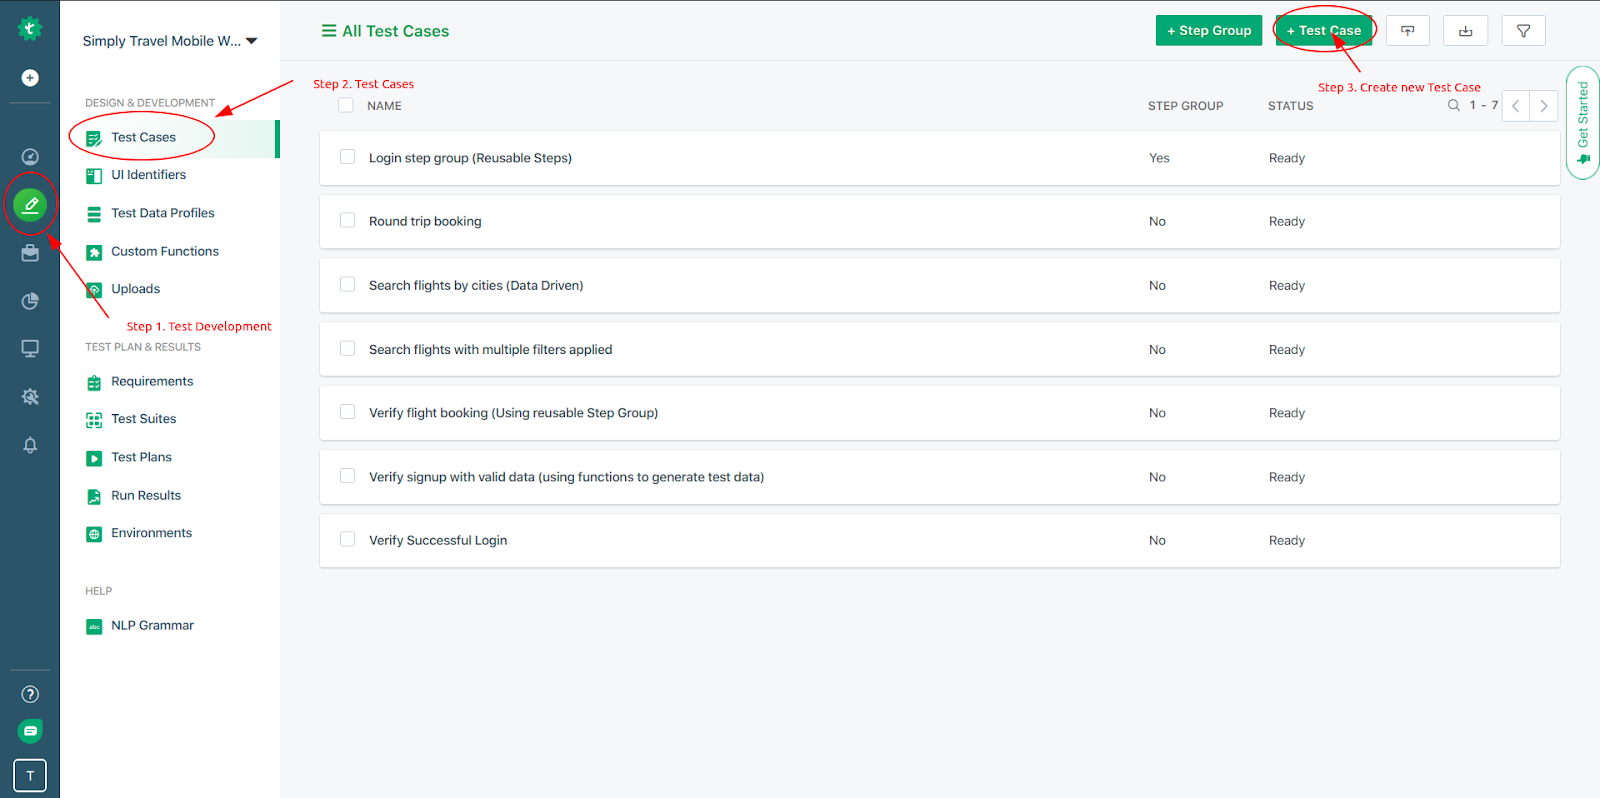
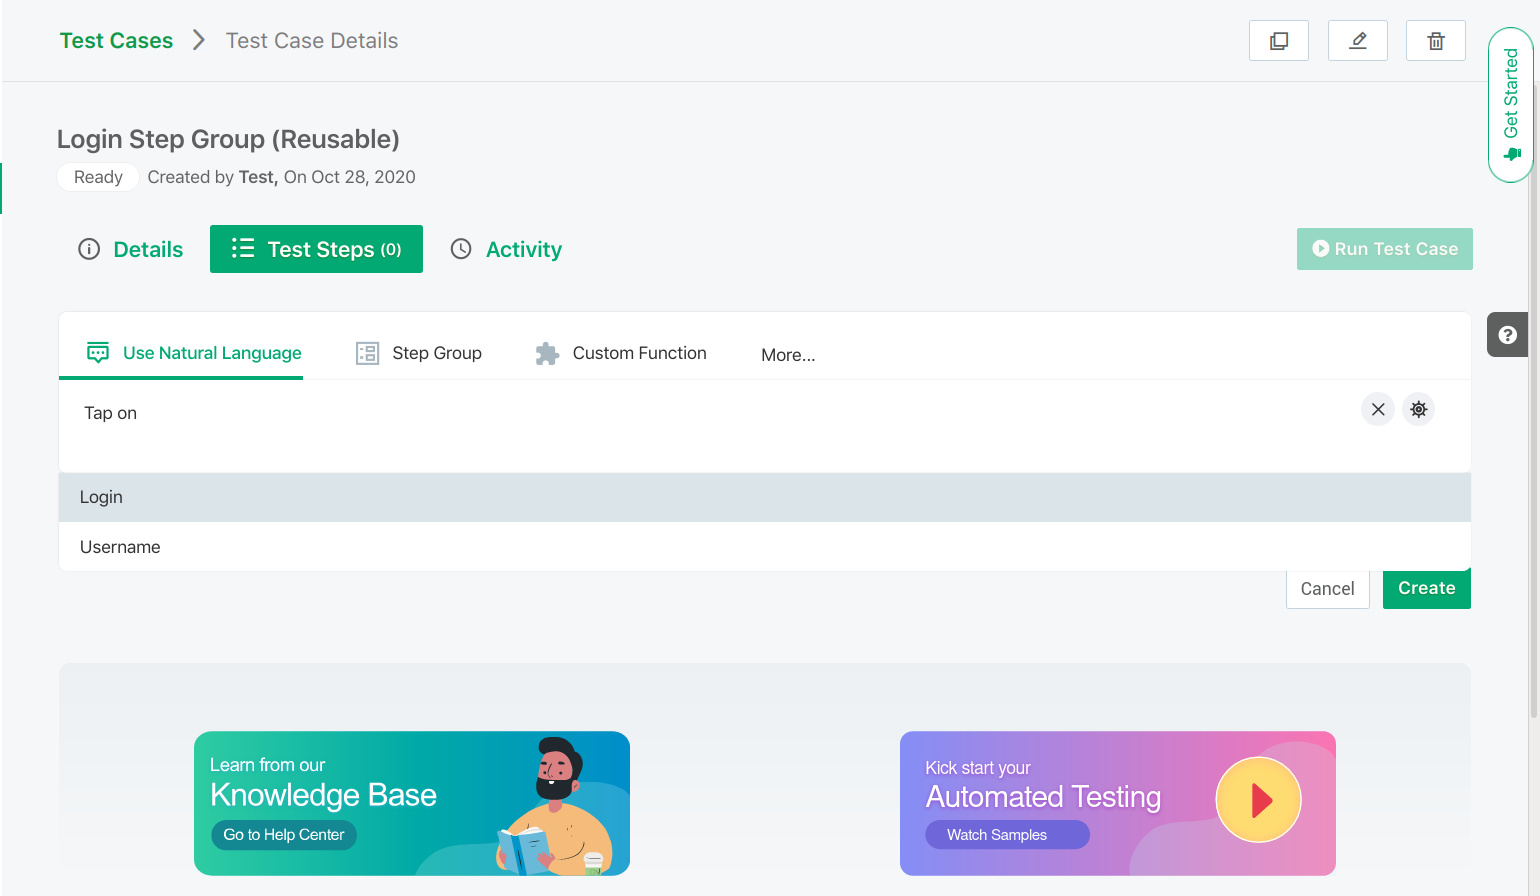
After clicking on the new test case button, you will now be able to create test steps. To demonstrate, start typing “Tap …”, it will show you a list of all the available options.
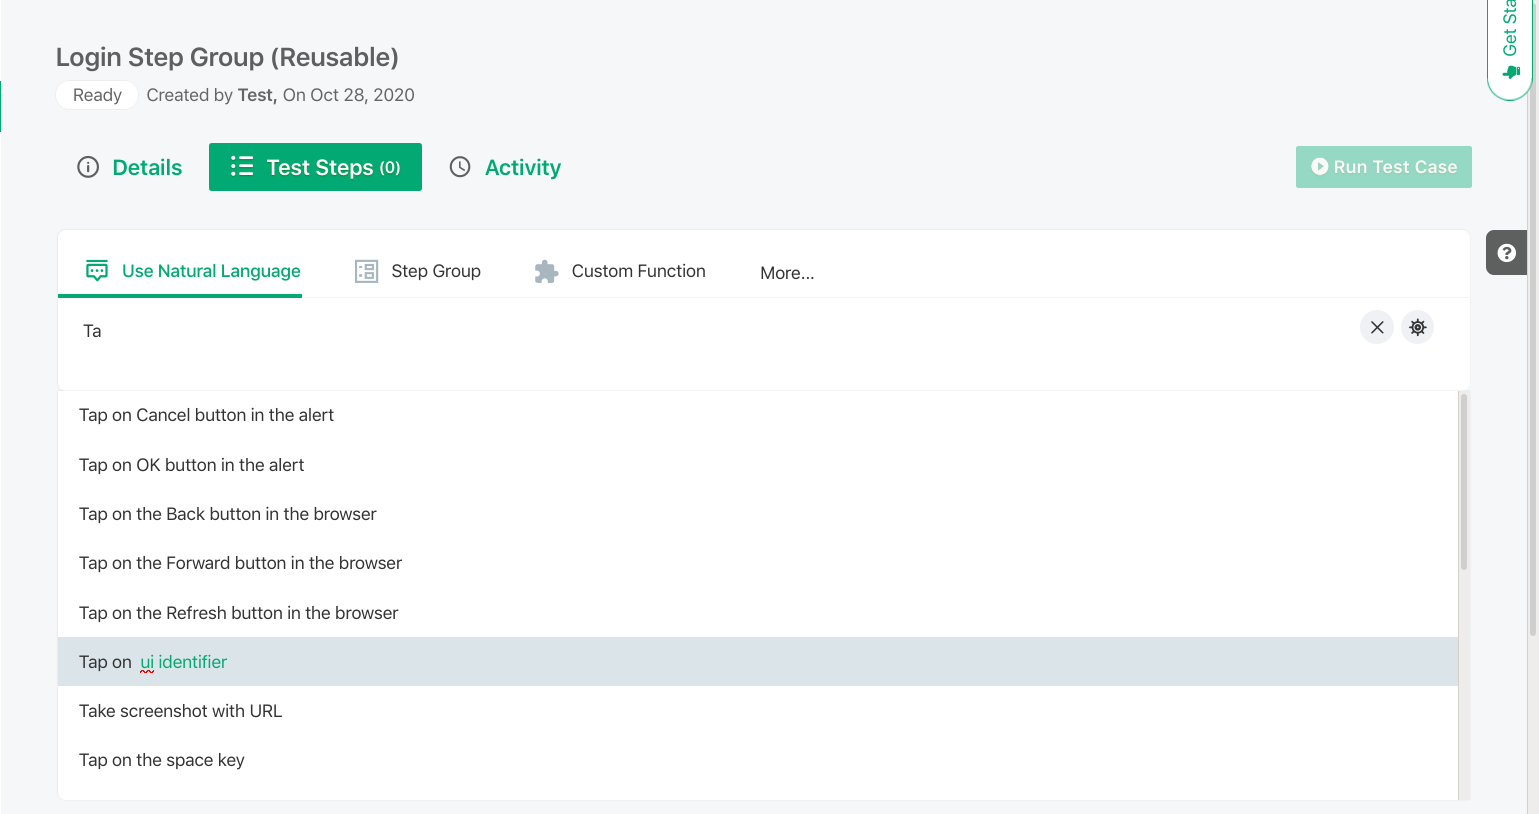
You can see that you have several options to choose from. To test the working of an UI component, you can select the “Tap on UI Identifier” option. Delete the “ui identifier” text and it will show you a list of UI Identifiers that you created in the previous steps.
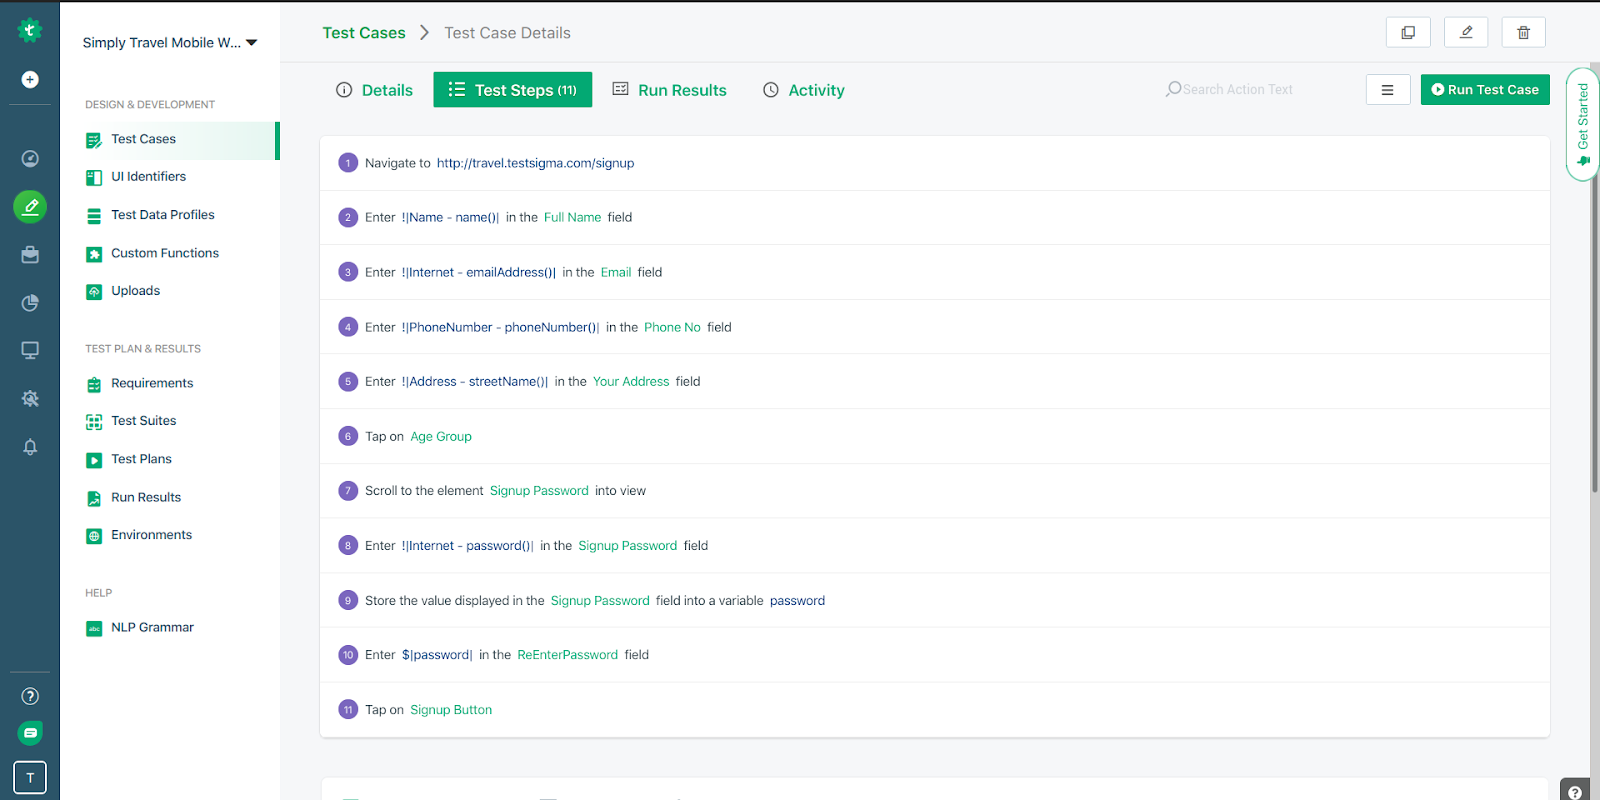
Here’s a list of some sample test steps that you can combine to create your own test case that caters to all your testing requirements.
Creating Test Plans for Cross-Browser Testing
Once you have created your test case with all the relevant test steps, you can move ahead and start creating your test plan for cross-browser testing.
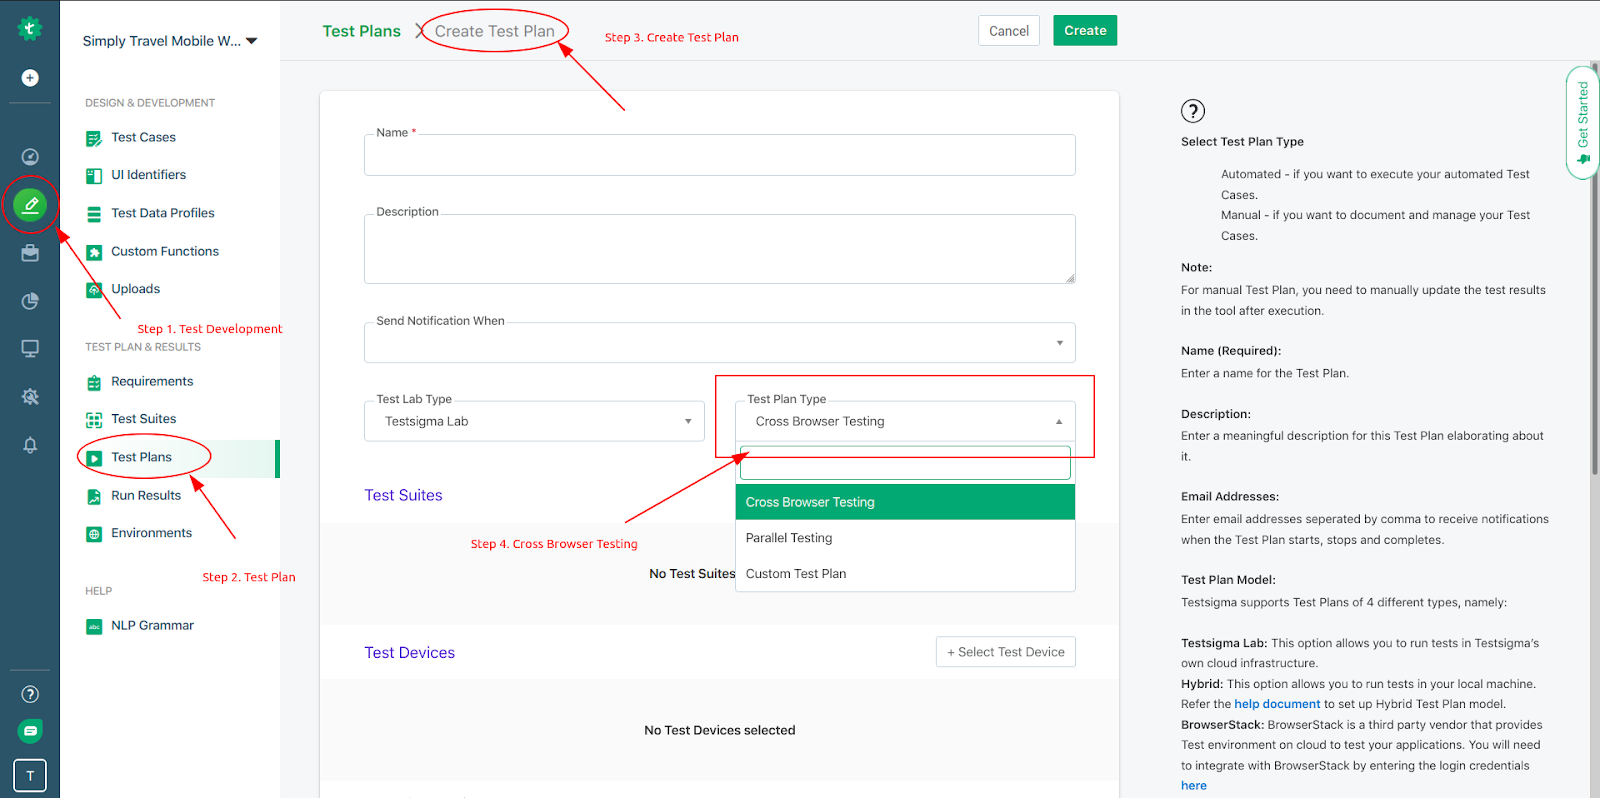
Navigate to the Test Plan section inside Test Development to create a new test plan. After entering details such as name, description, etc., for the test plan type, you need to select the Cross Browser Testing option so that you can select multiple browsers to perform your tests on.
Post that, you need to select the test suite on which you want to perform cross-browser testing. You can also select multiple test suites all at once.

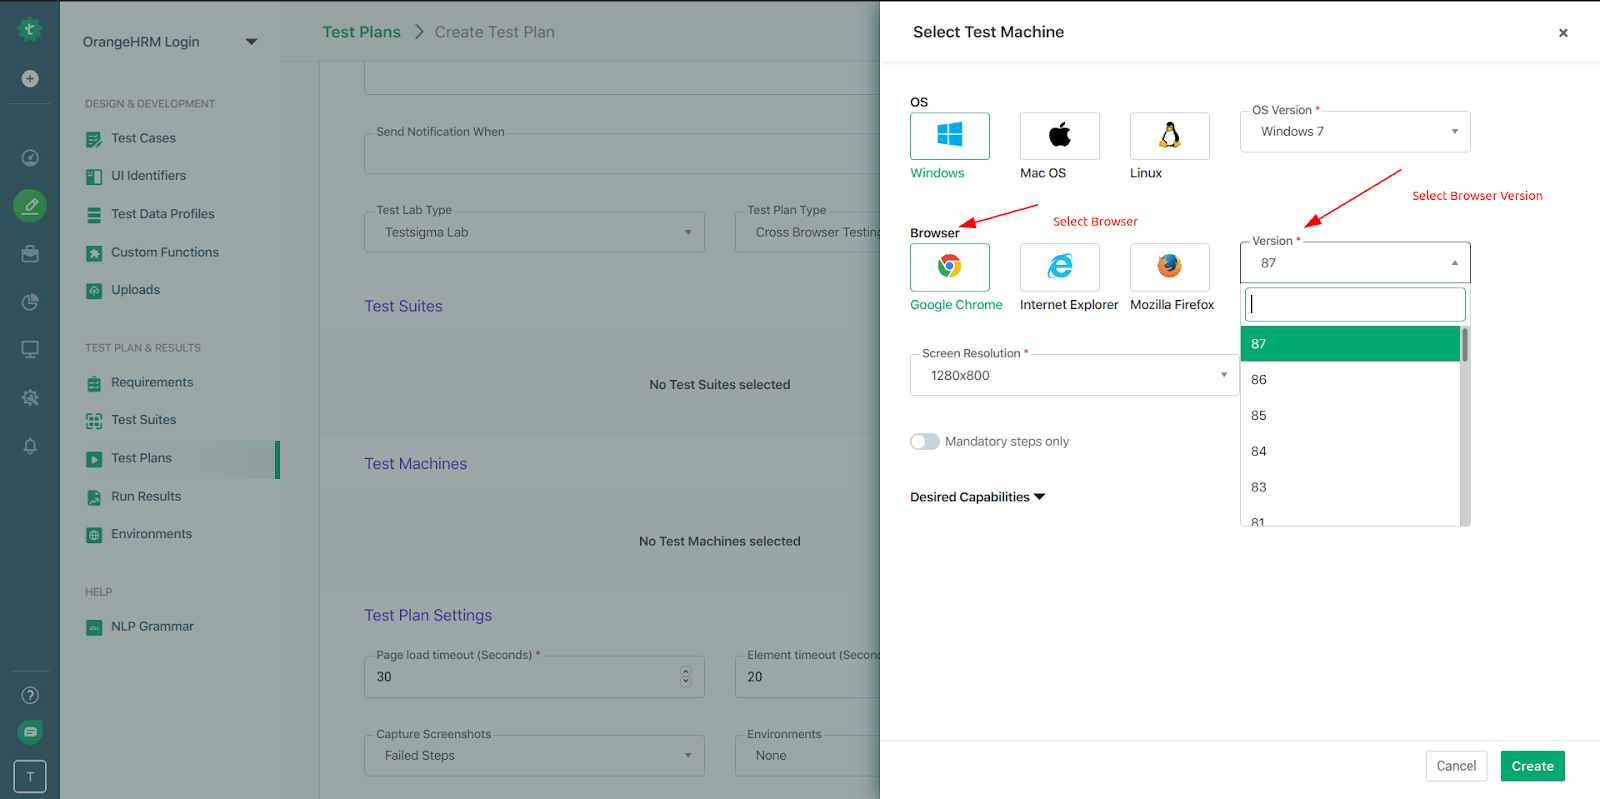
After you have selected all the test suites, you can now move forward to select the test environment which includes the type of OS, Browsers and their versions. To do so, select the Test Machines option and choose your desired browser-OS combination.
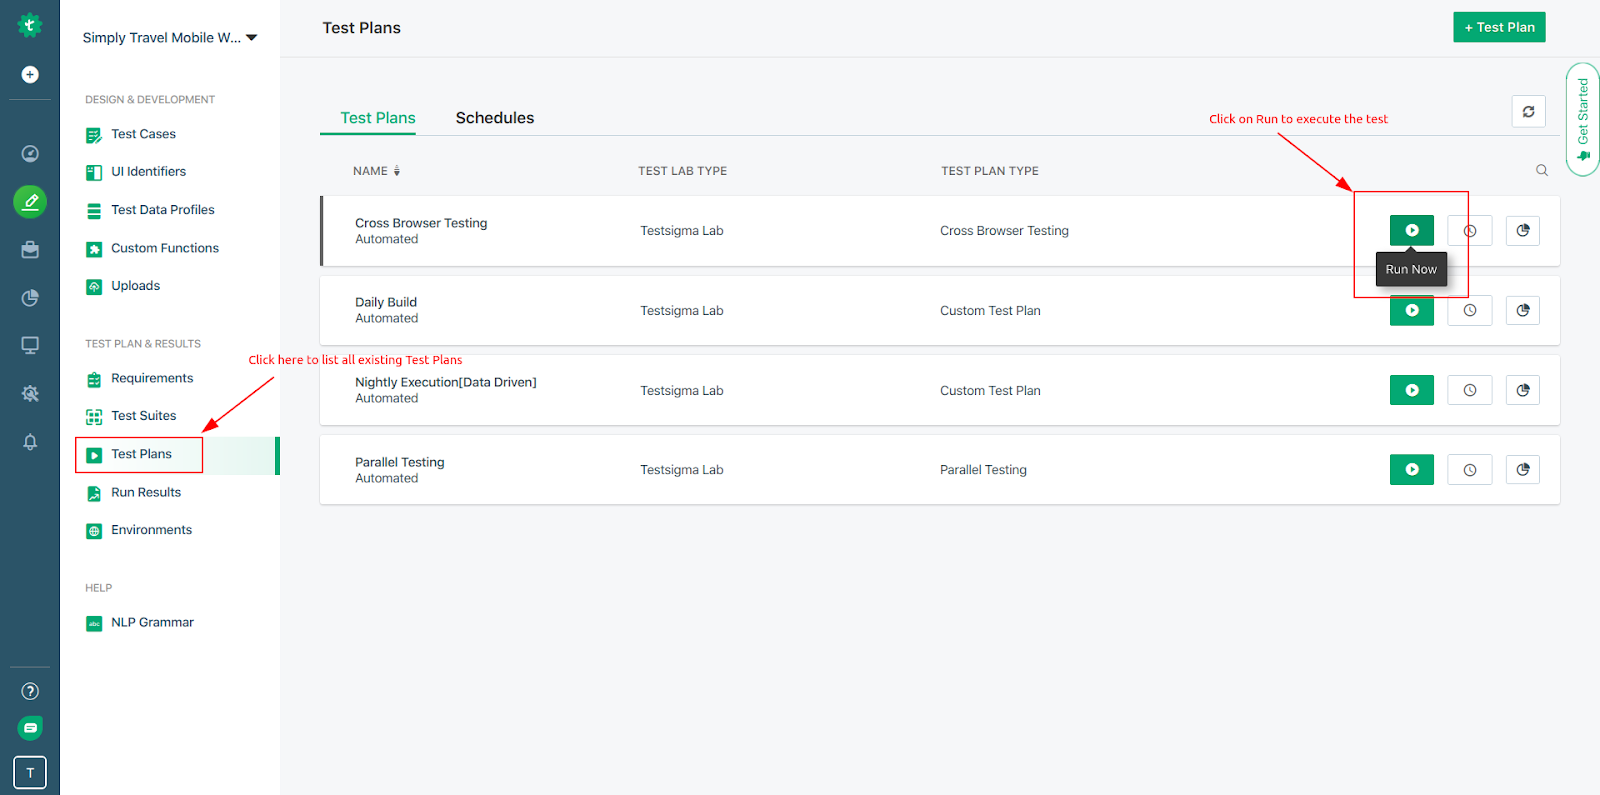
Once, you have created your Test Plan, you can run the execution by clicking on the Run button.
Analyzing the Reports
Testsigma allows you to create customizable reports as per the test requirements and let’s you access reports for individual test environments so that you can locate the root cause of failure much faster than any other tool.
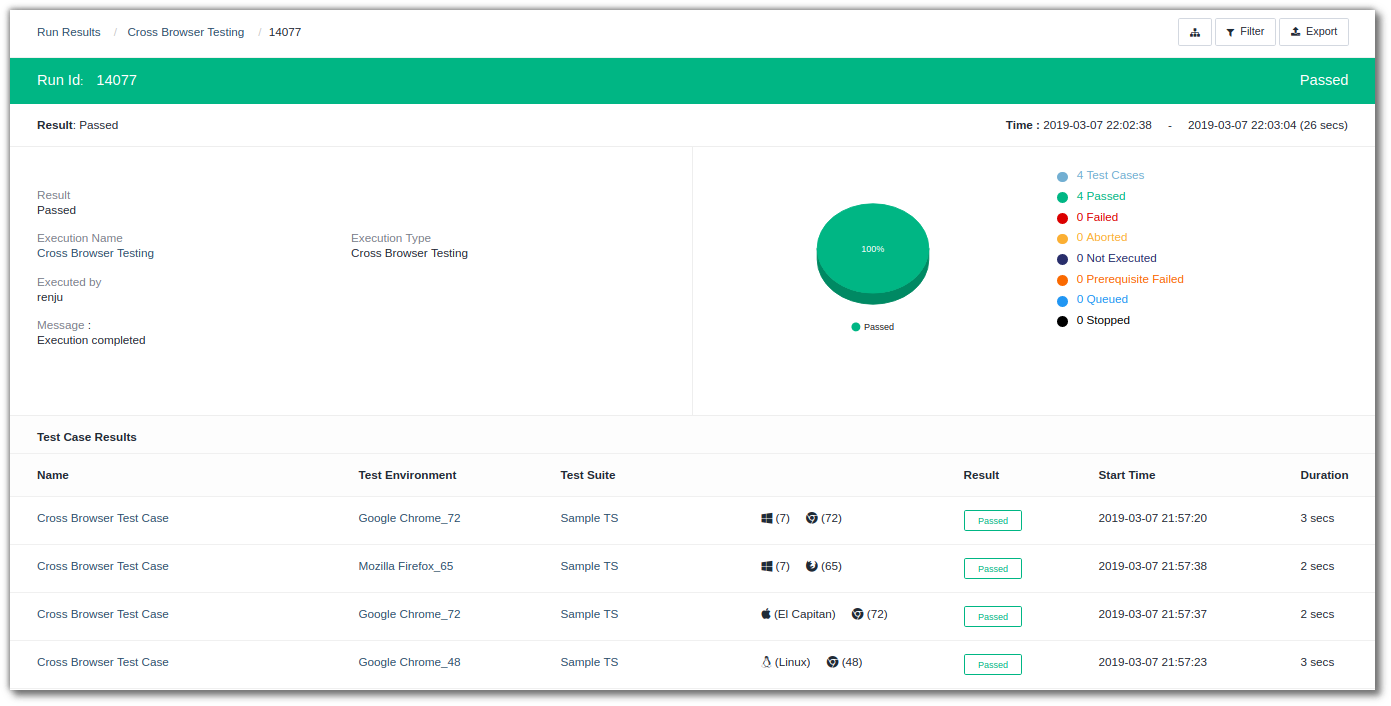
Testsigma allows you to compare your test results on multiple browser-OS combinations simultaneously to get a birds-eye view of the entire scenario.
Bottom Line
Testsigma helps you to zero in on all your problems when it comes to cross-browser testing. Performing functional and visual testing of web applications on multiple browsers at a time is quite a hectic task. With automated tools like Testsigma, this becomes a walk in the park. The process is quite simple. You just need to identify the UI identifiers, and Testsigma helps you to record them automatically.
After importing all the necessary UI Identifiers, create simple test cases incorporating the identifiers in simple plain English. Create a Test Plan for cross-browser testing with all the browsers and OS versions you want to run your tests on. With features such as parallel testing, you can run your tests multiple times on large and complex test suites quickly and efficiently. For Cross Browser Tests, you can get individual comprehensive reports for all the combinations of browsers and OS environments on which you perform your tests.
With high-end features such as creating scriptless test cases, parallel testing, third-party integrations, advanced bug reporting, and an excellent support team, Testsigma is probably the best cross-browser testing tool you will come across.
Еще об этом:
 Manual Testing Interview Questions and Answers
Regression Testing With Testsigma
Data Driven Testing with TestSigma
Types of Testing | Software Testing Types Every QA Should Know
Testsigma introduction
Cross Browser Testing
API Testing with TestSigma
Cross-browser Testing with Browserling Review
SQL For Testers
What is Automation Testing?
Manual Testing Interview Questions and Answers
Regression Testing With Testsigma
Data Driven Testing with TestSigma
Types of Testing | Software Testing Types Every QA Should Know
Testsigma introduction
Cross Browser Testing
API Testing with TestSigma
Cross-browser Testing with Browserling Review
SQL For Testers
What is Automation Testing?