
Mobile Application Testing with TestSigma
A report by statista suggests that mobile devices alone have generated around 51.53 percent of the total web traffic till the first quarter of 2020 and is expected to increase exponentially in the upcoming years. Due to this increased usage of mobile devices, creating a user-friendly, responsive mobile application has become a necessity more than a trend.
Performing Mobile Application Testing using Testsigma is easy-peasy-lemon-squeezy when compared to other similar tools. The Testsigma, Automated Testing Tool provides tons of features to help you get started with your Mobile Application Testing.
Due to its intuitiveness, feature-rich and affordable testing tools, Testsigma has successfully secured a permanent position in the favorites list of the Testers and Developers. Let’s take a sneak peek into some of its features.
- It helps you to build automated and stable tests for mobile applications by allowing you to run tests on 2000+ iOS and Android Devices which are available on Cloud.
- You can create your mobile automated tests easily with natural-language-based test steps.
- You can run tests concurrently which helps you to reduce the execution time.
- It provides you access to comprehensive test reports along with a drill down approach. This helps you to analyze results quickly.
Having discussed this, let’s take a deep dive into some easy and useful steps that would provide you with a seamless Mobile Application Testing experience. In this article, we will demonstrate how you can perform Mobile Application Testing using the WordPress APK (Android Version). Using similar steps, you can also perform Mobile Application Testing for iOS applications.
Content
Preconditions
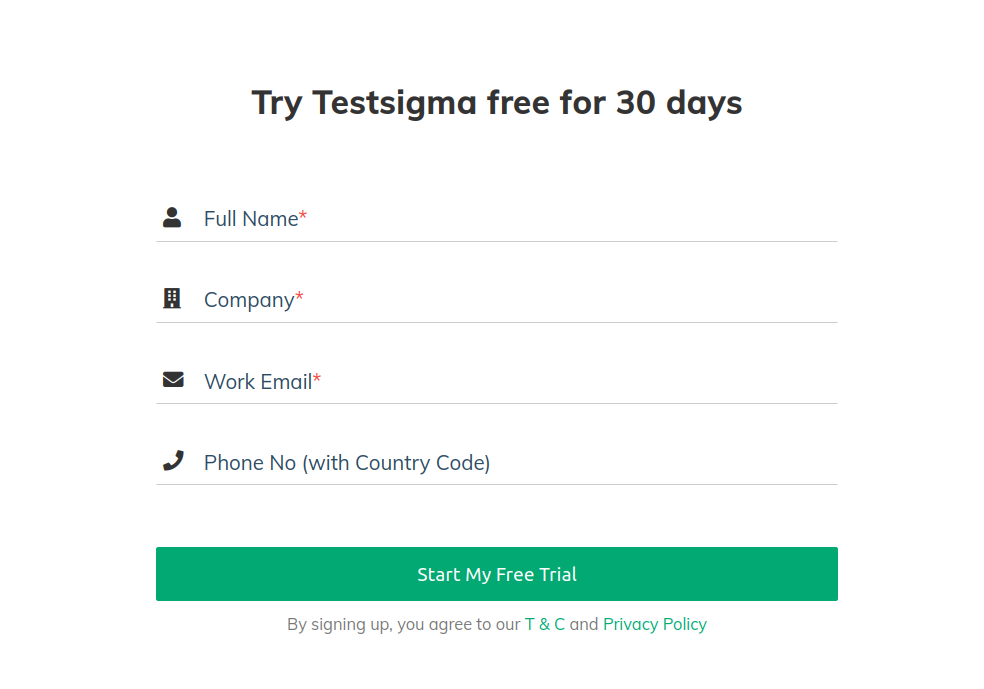
To begin your journey with Testsigma, you need to have an account with TestSigma. You can sign up here to create a Free Trial Account.
Create a Project and Application
After you have access to your TestSigma account, you can move ahead and start creating a Project.
To create a project, click on the + icon in the TestSigma Dashboard.
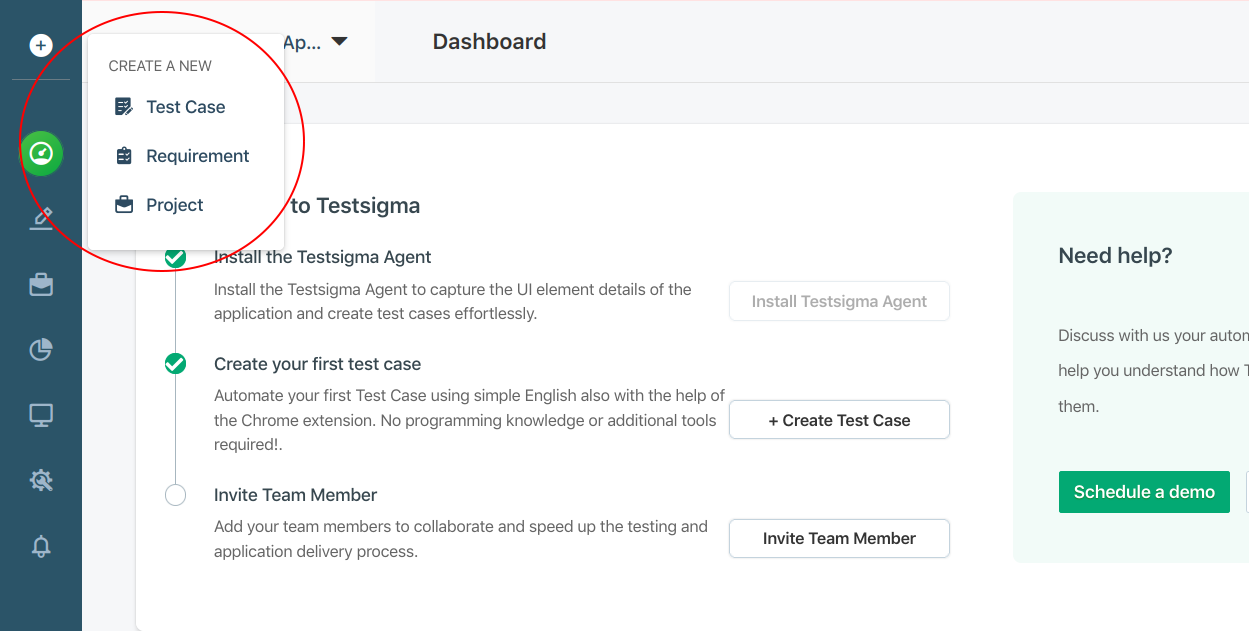
Click on the Project button (highlighted above) to start creating a project.
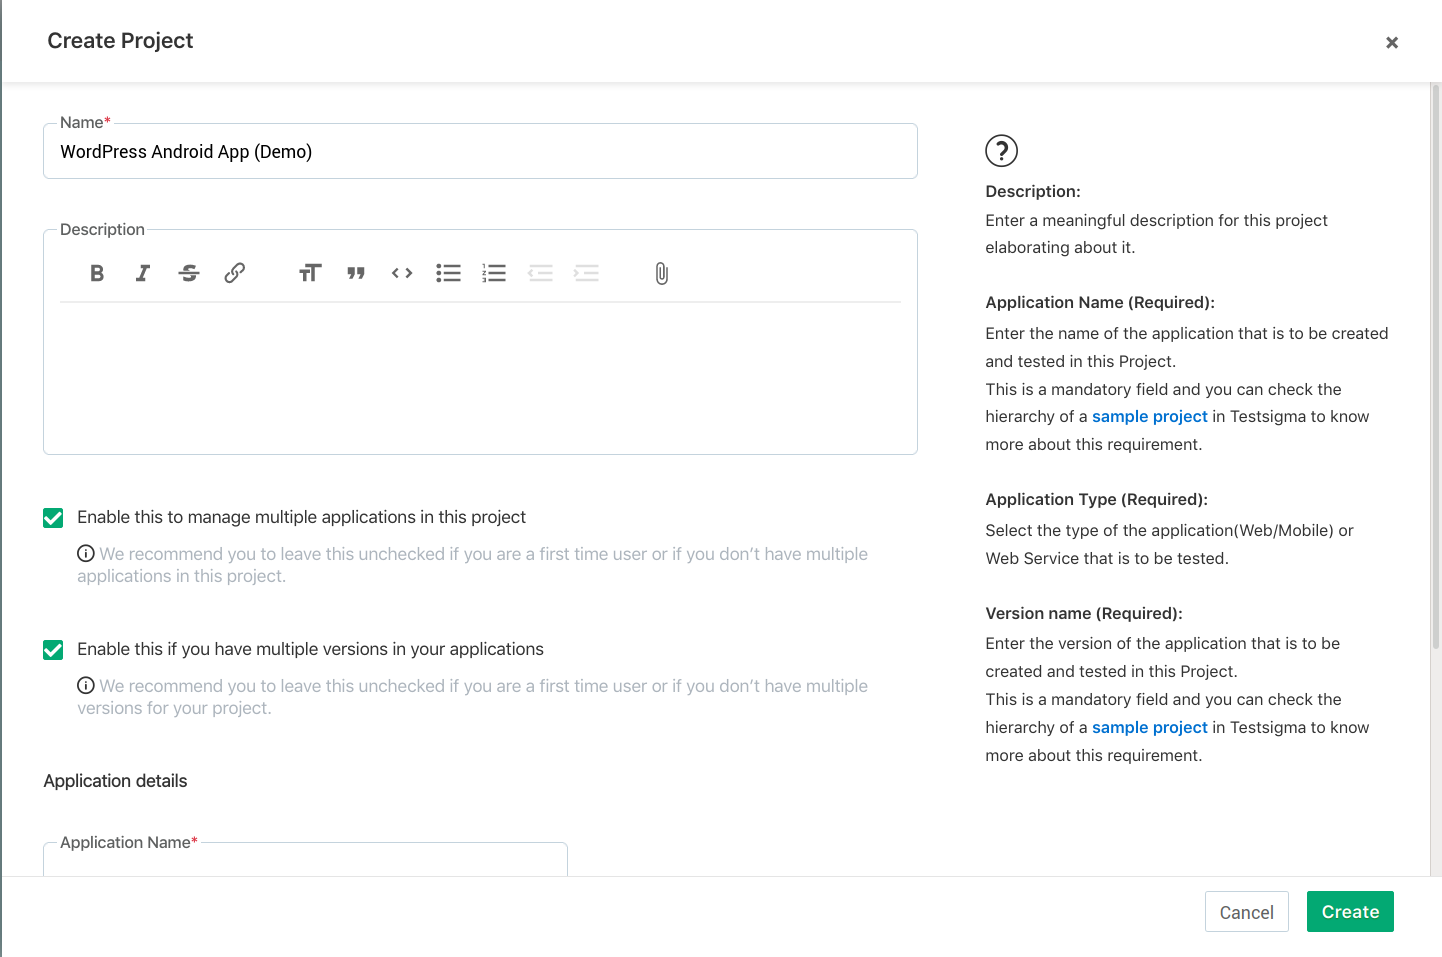
Enter the Project Name, Description (Optional). To manage multiple applications in this project, check the box which says “Enable this to manage multiple applications in this project”. After that, you have to enter the Application Name.
Since, we are performing Mobile Application Testing, in the Application Type drop-down menu, select Android Native Application.
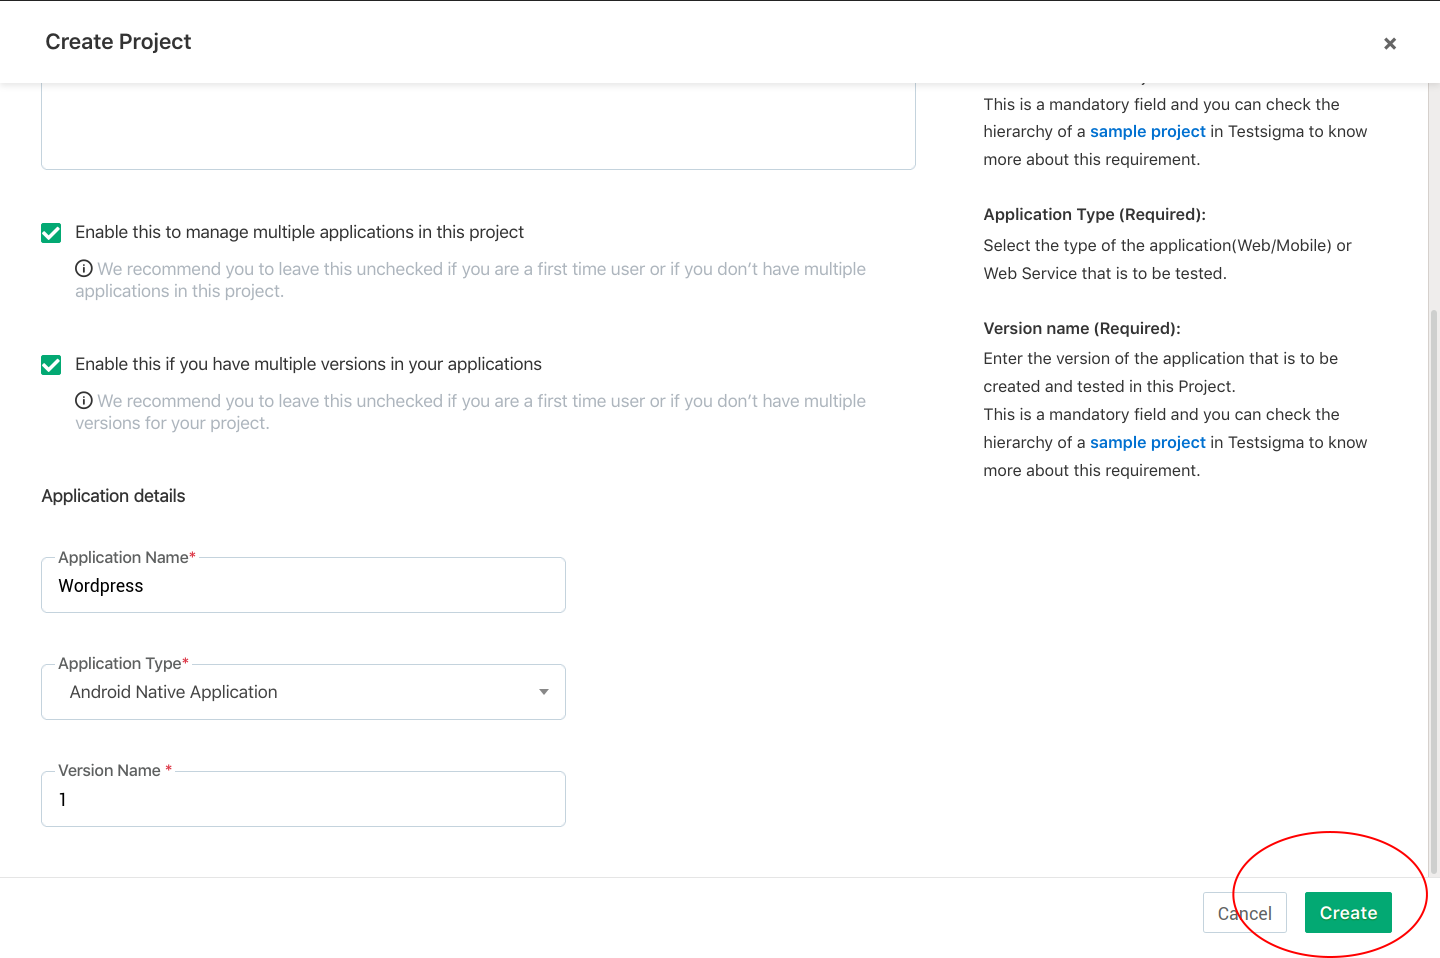
After entering all the details, you can click on the Create button to create the Project.
Create UI Identifiers
- To select the appropriate button or text box while creating test steps, you will need UI Identifiers. A UI Identifier helps in locating UI elements of any application through unique identifiers such as id, Classes, etc.
- Inside the Test Development option on the left context menu, click on UI Identifiers option.
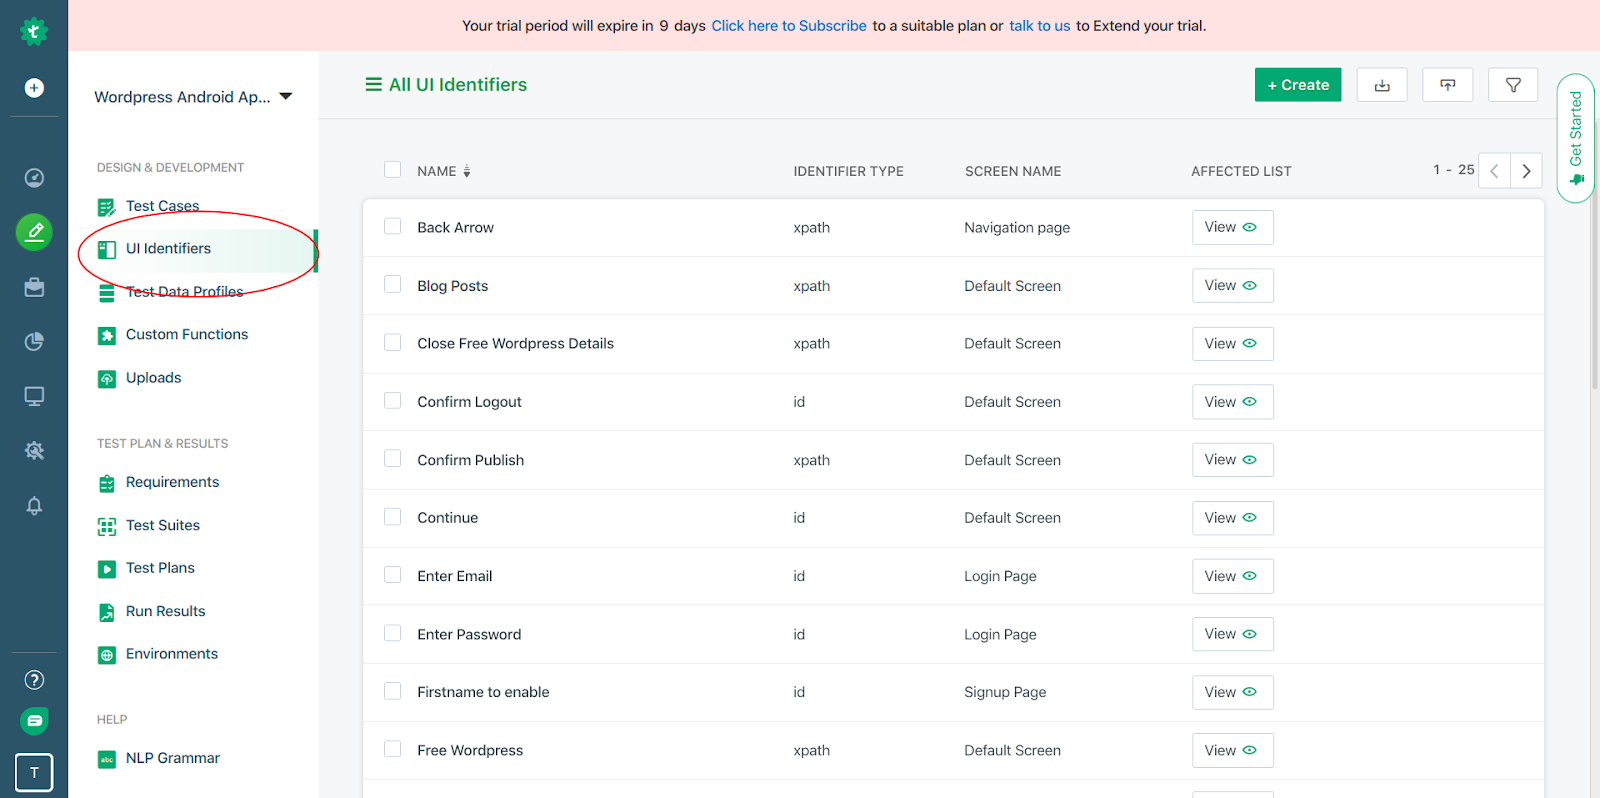
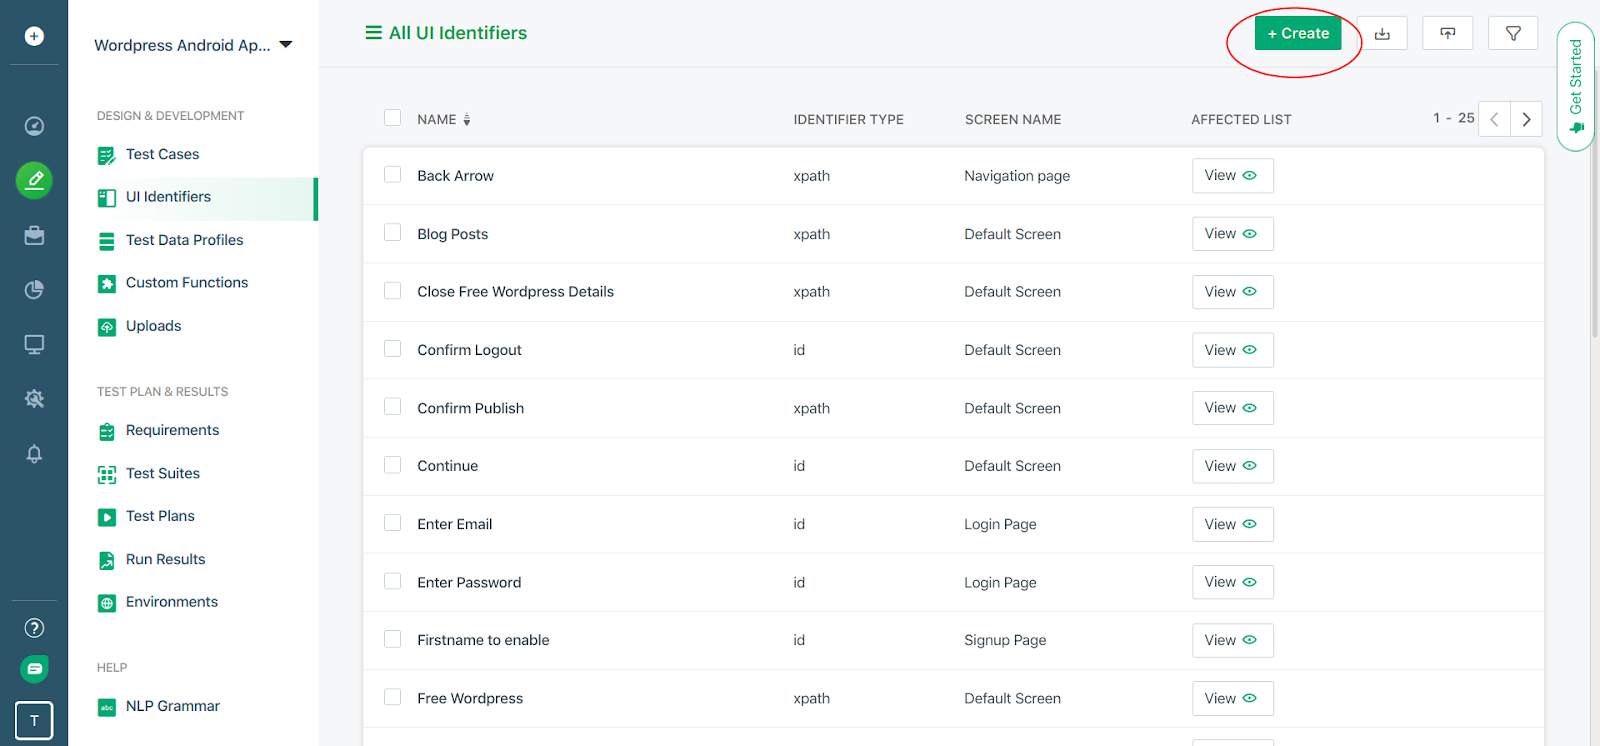
- Click on the Create button on the top right corner of the UI Identifiers page. It allows you to either import UI identifiers from excel sheet or create one manually.
- After clicking on the create button, you will be directed to the following screen.
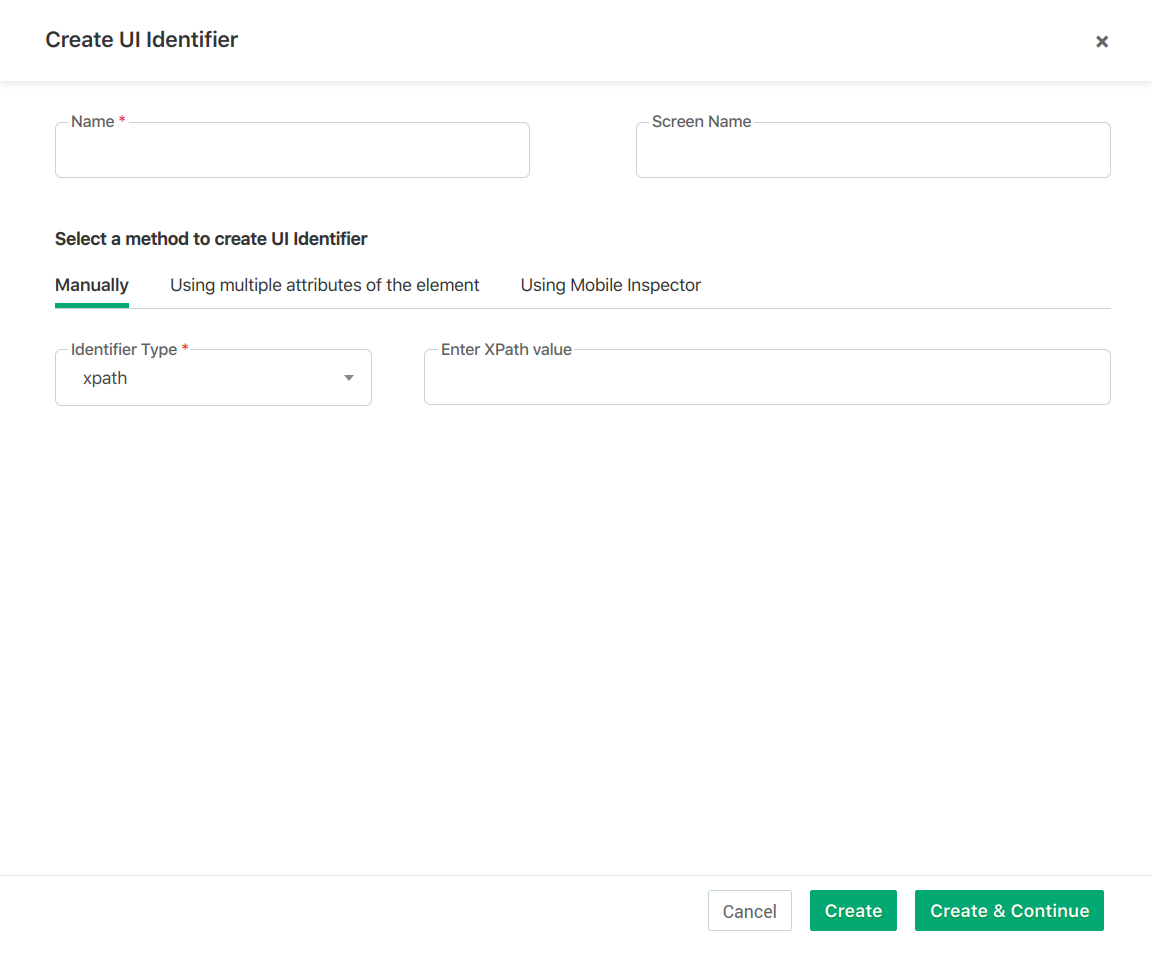
- Here, you have 3 options to create UI Identifiers.
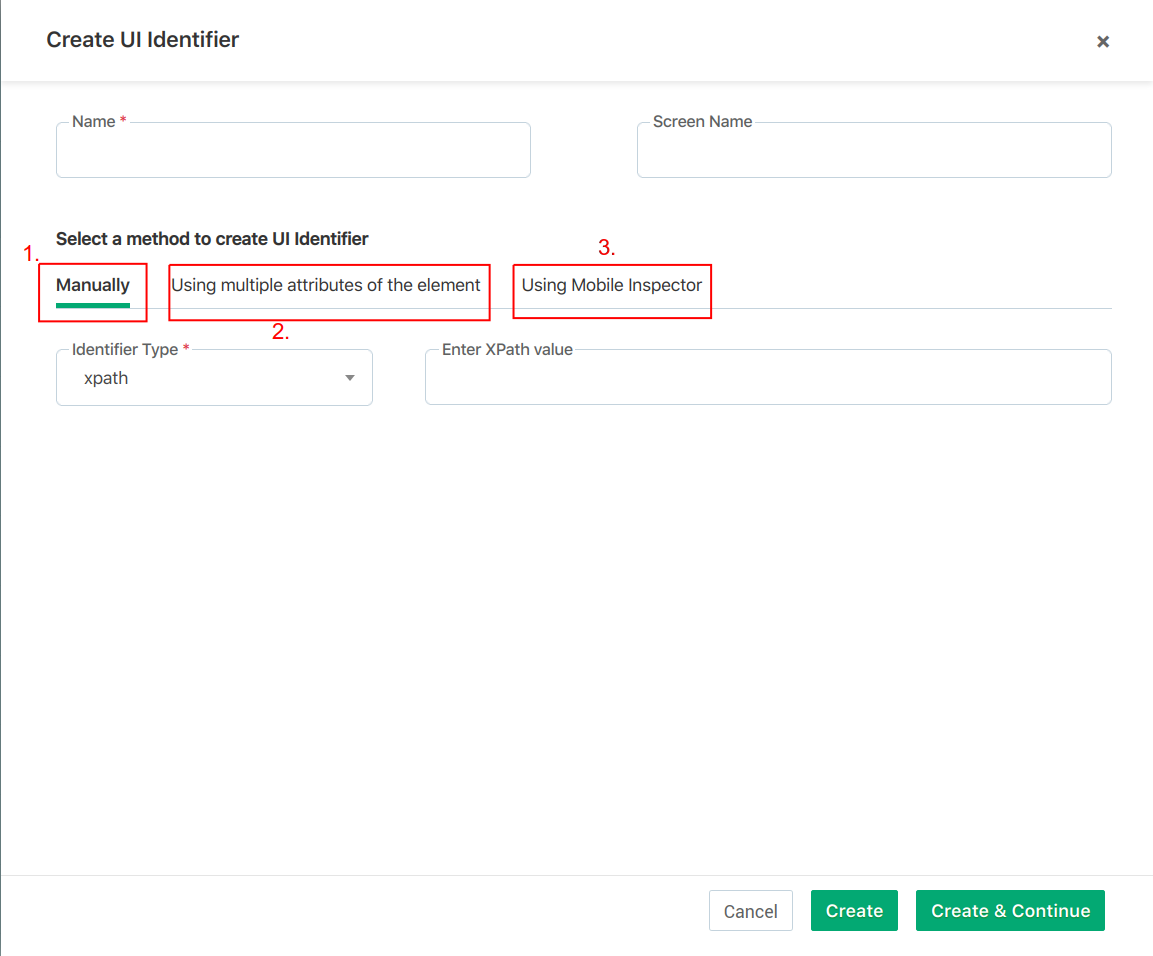
You can either add UI Identifiers manually which we will be discussing in the upcoming steps. You can also select the “Using multiple attributes of the element” option, to select more than one attributes such as CSS selectors, IDs, Classes, etc. for an element.
The “Using Mobile Inspector” tool allows you to add all the UI Identifiers automatically by crawling through the entire application.
- We will show you how to add UI identifiers manually. Choosing UI Identifiers manually allows you to add only those Identifiers which you will actually require in your test steps.
- We are going to create many UI Identifiers to test multiple Input fields and elements. Have a look at the Email UI Identifier.
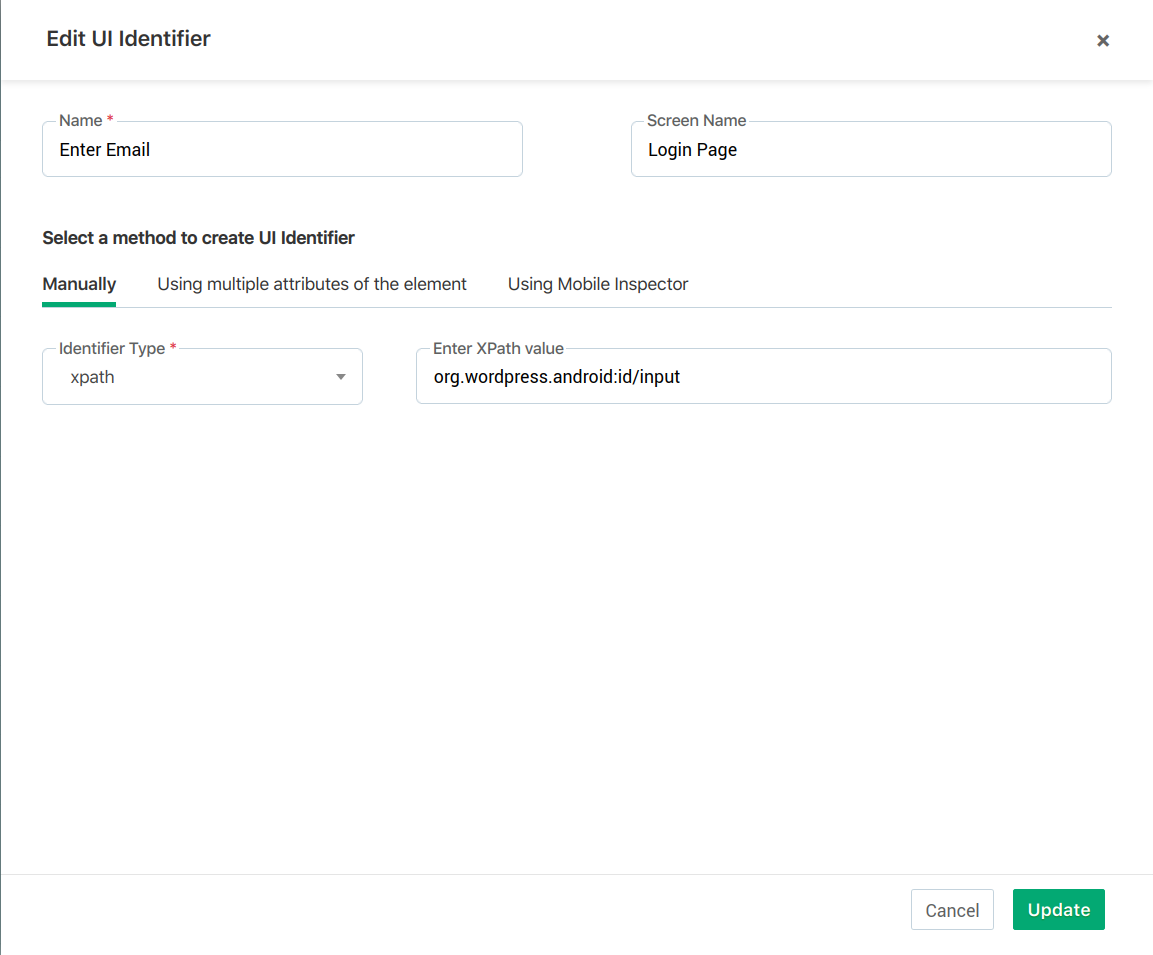
Using similar ways, you can create all your UI Identifiers.
Creating Test Cases
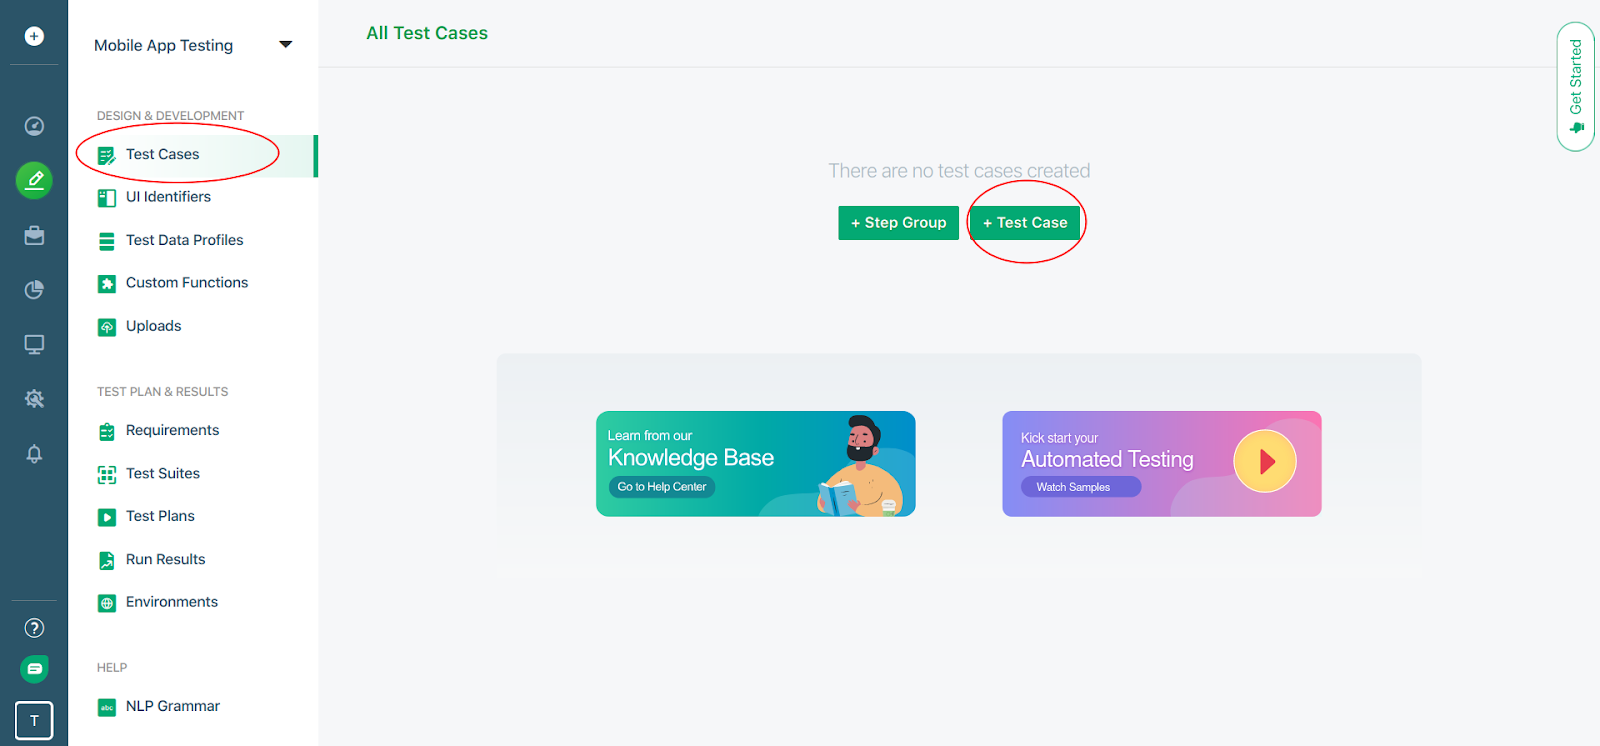
- After you have created your UI Identifiers, the next step is to create Test Cases. Click on the Test Cases button on the left Context Menu just above the UI Identifiers. Then click on Create New Test Case Button.
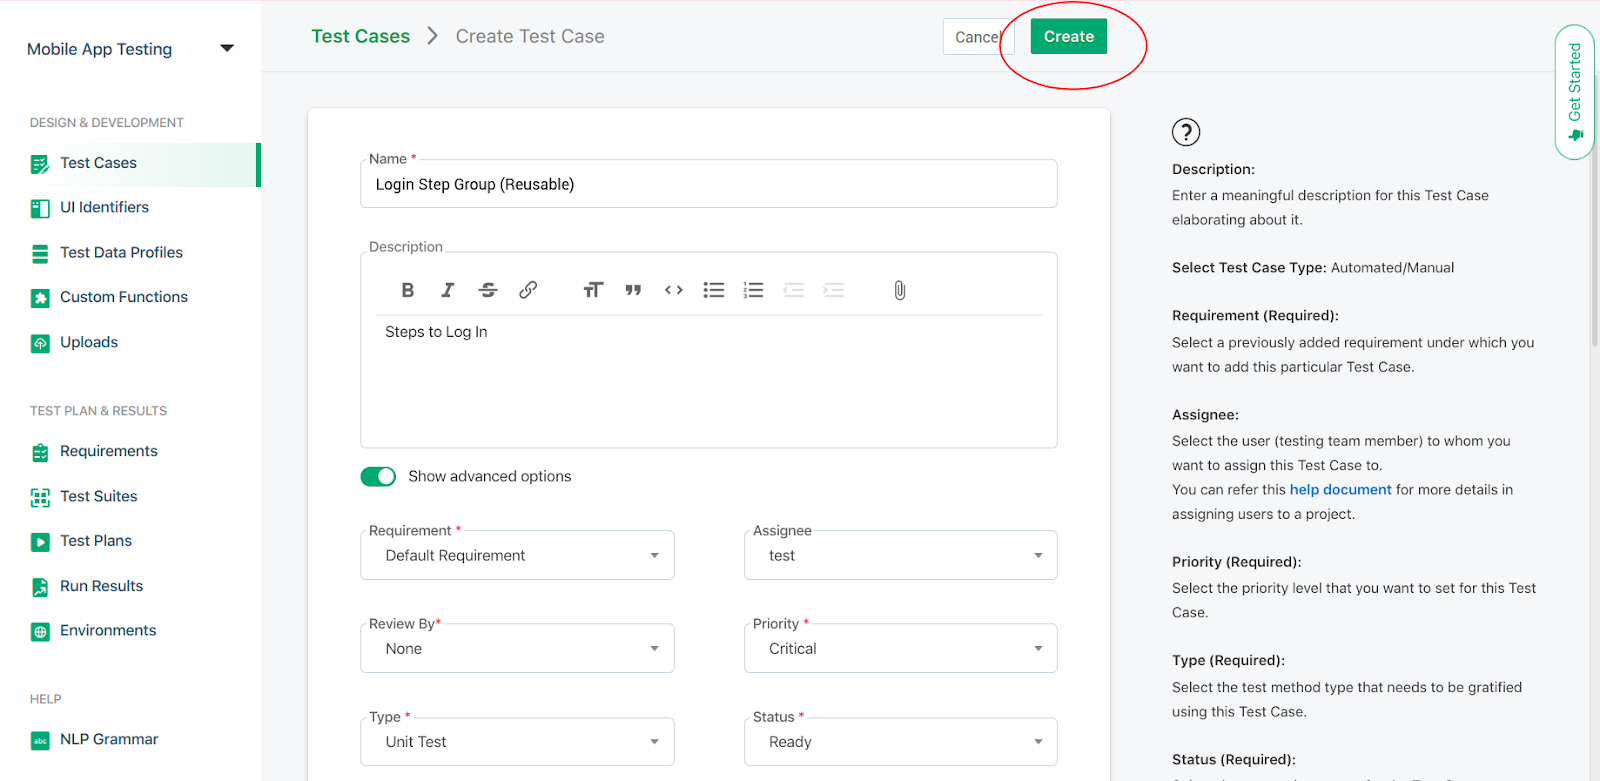
- After clicking on the Create button, enter details such as Name, Description, etc. After entering all the details, you can click on Create Button.
- After you click on the Create button, You will be asked to enter Test Steps.
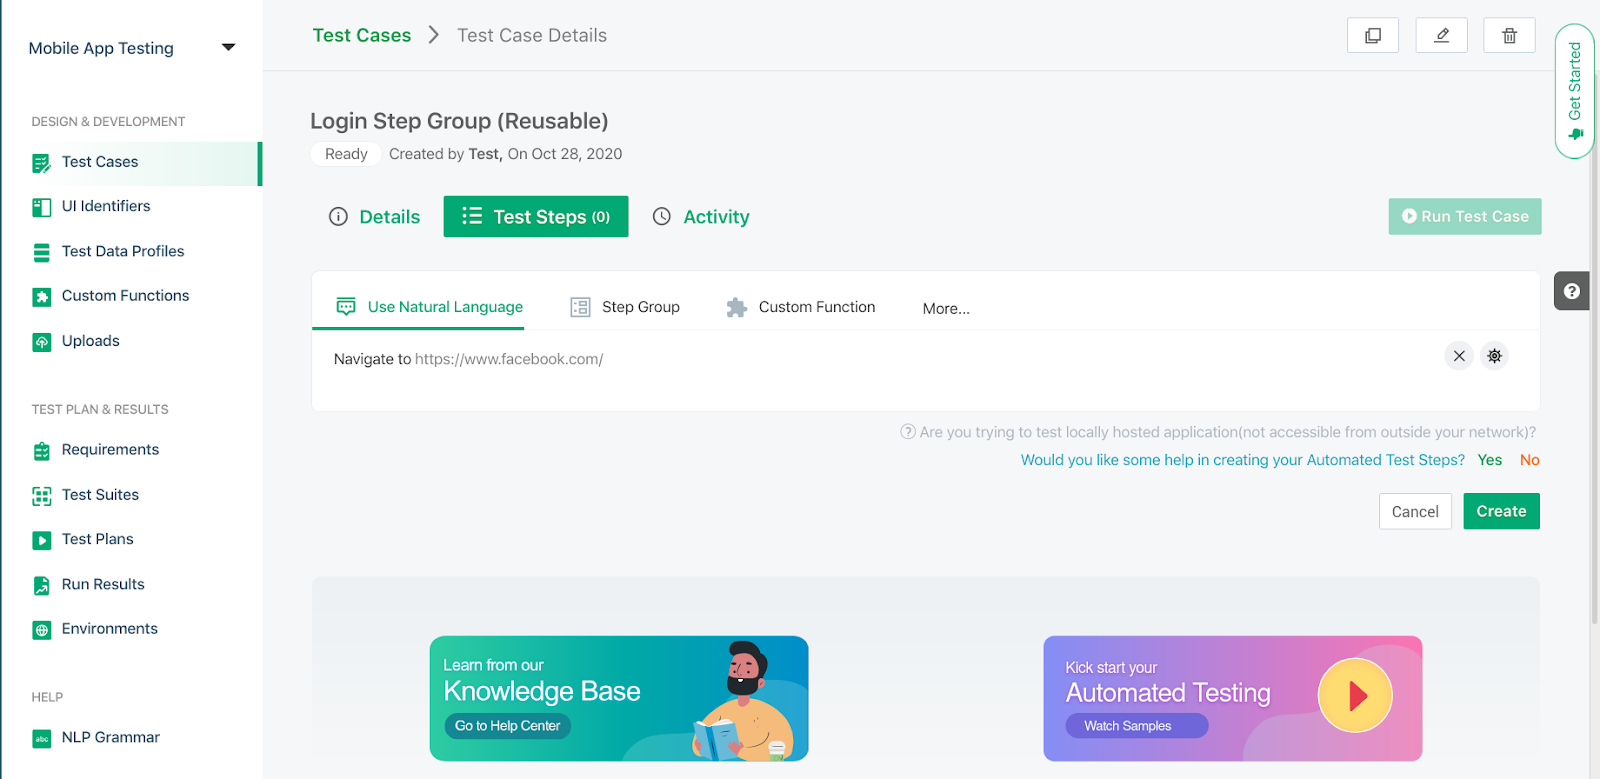
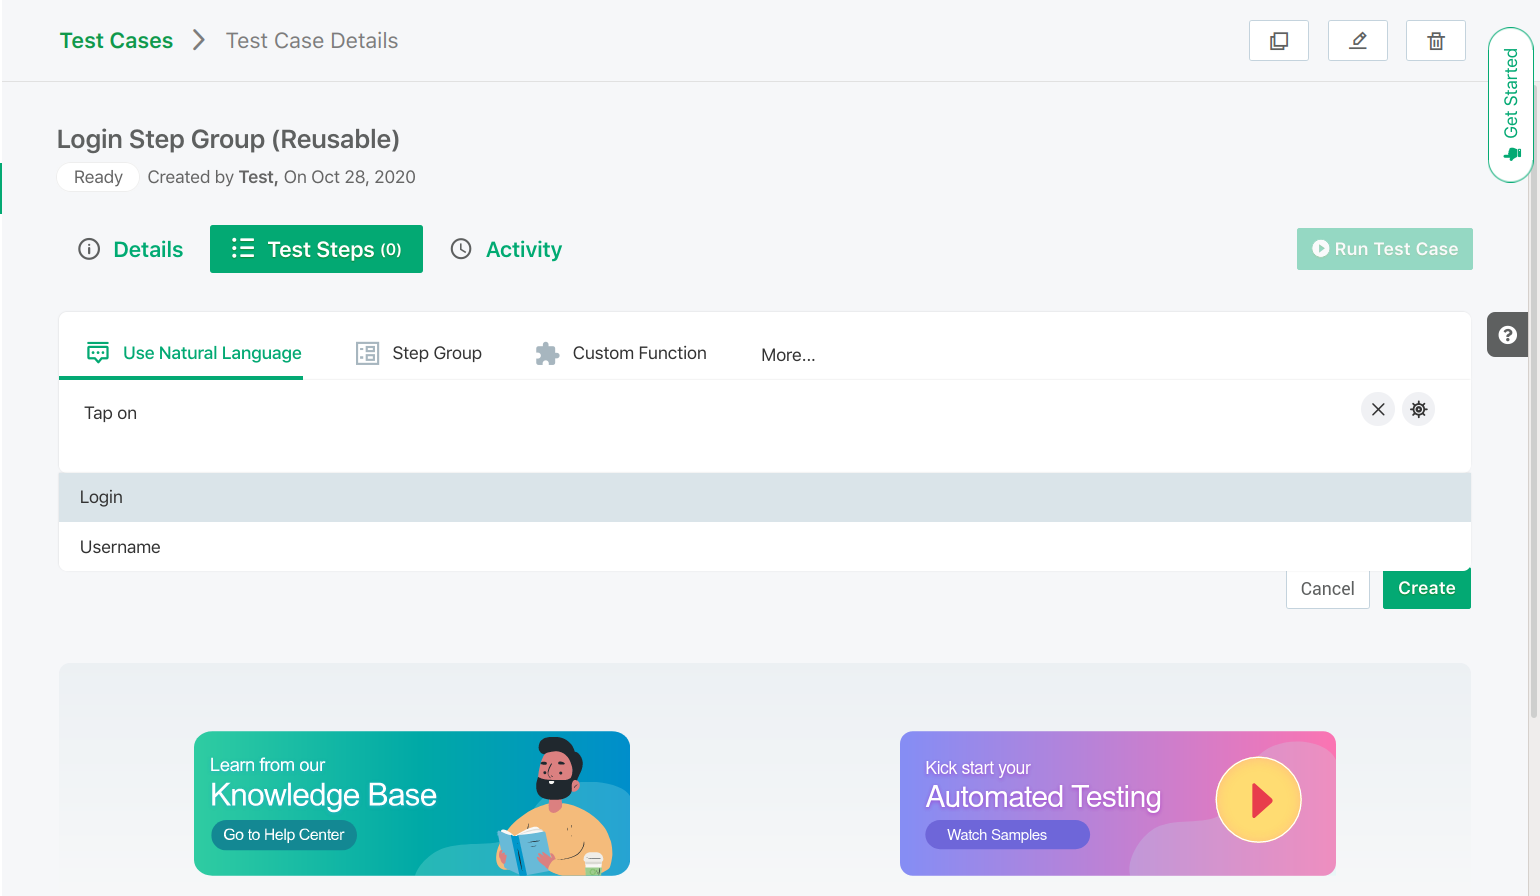
- TestSigma allows you to create Test Steps in simple Natural Language. To create Test Steps, start typing on the field and a list of options appear on the screen. We will create a Test Step to Launch the App and then tap on the Login Button.
- In the input field, type “Launch App” and click on Create Button.

- Next, Start typing “Tap..”, it will show you a list of available options.
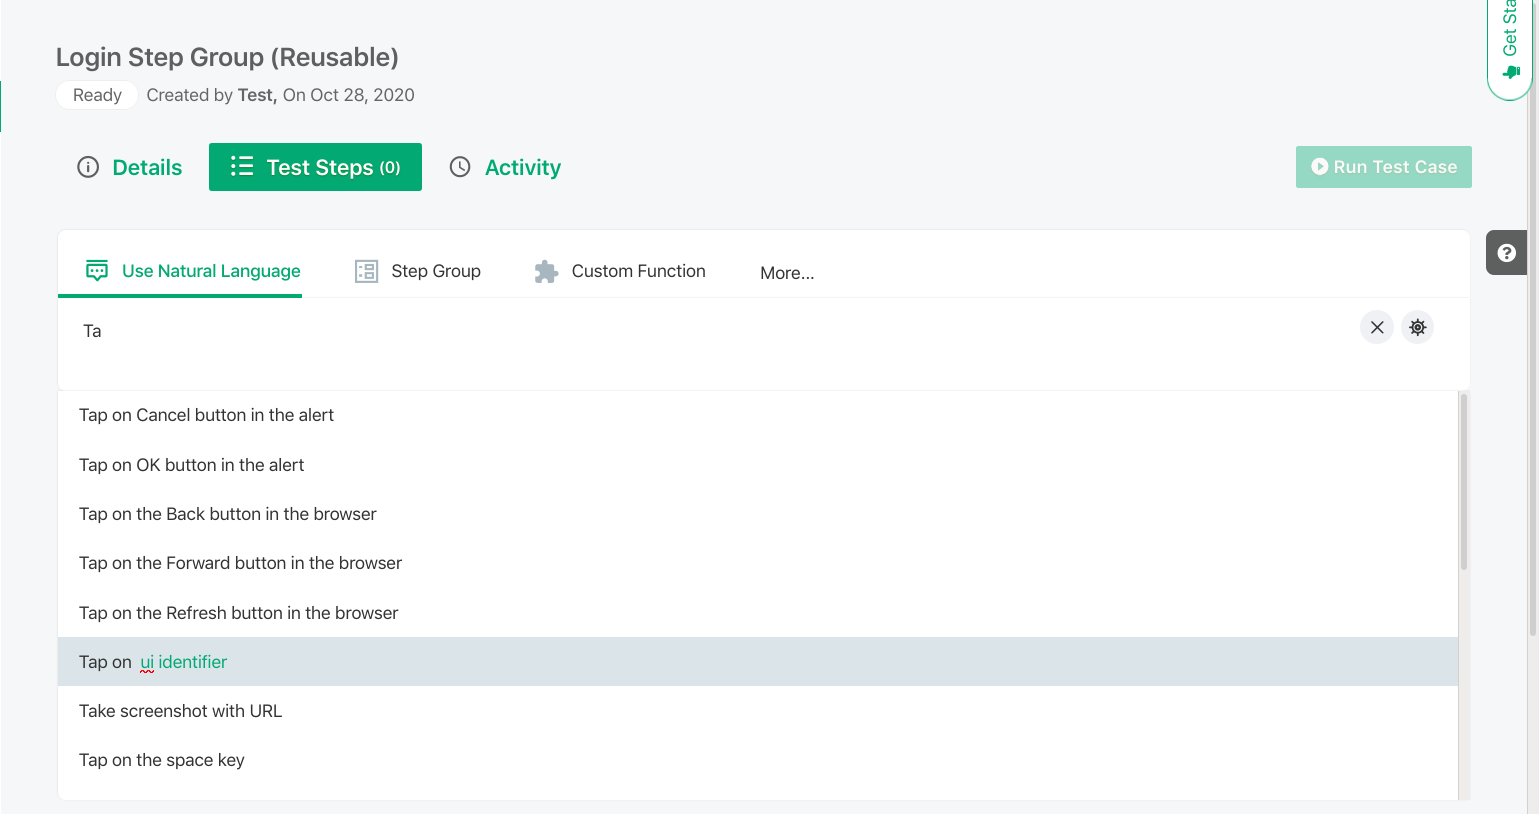
- Click on the “Tap on ui identifier” option. Delete the “ui identifier” text and it will show you a list of UI Identifiers that you created in the previous steps. Since we need to tap on the Login button, we will select the Login Identifier.
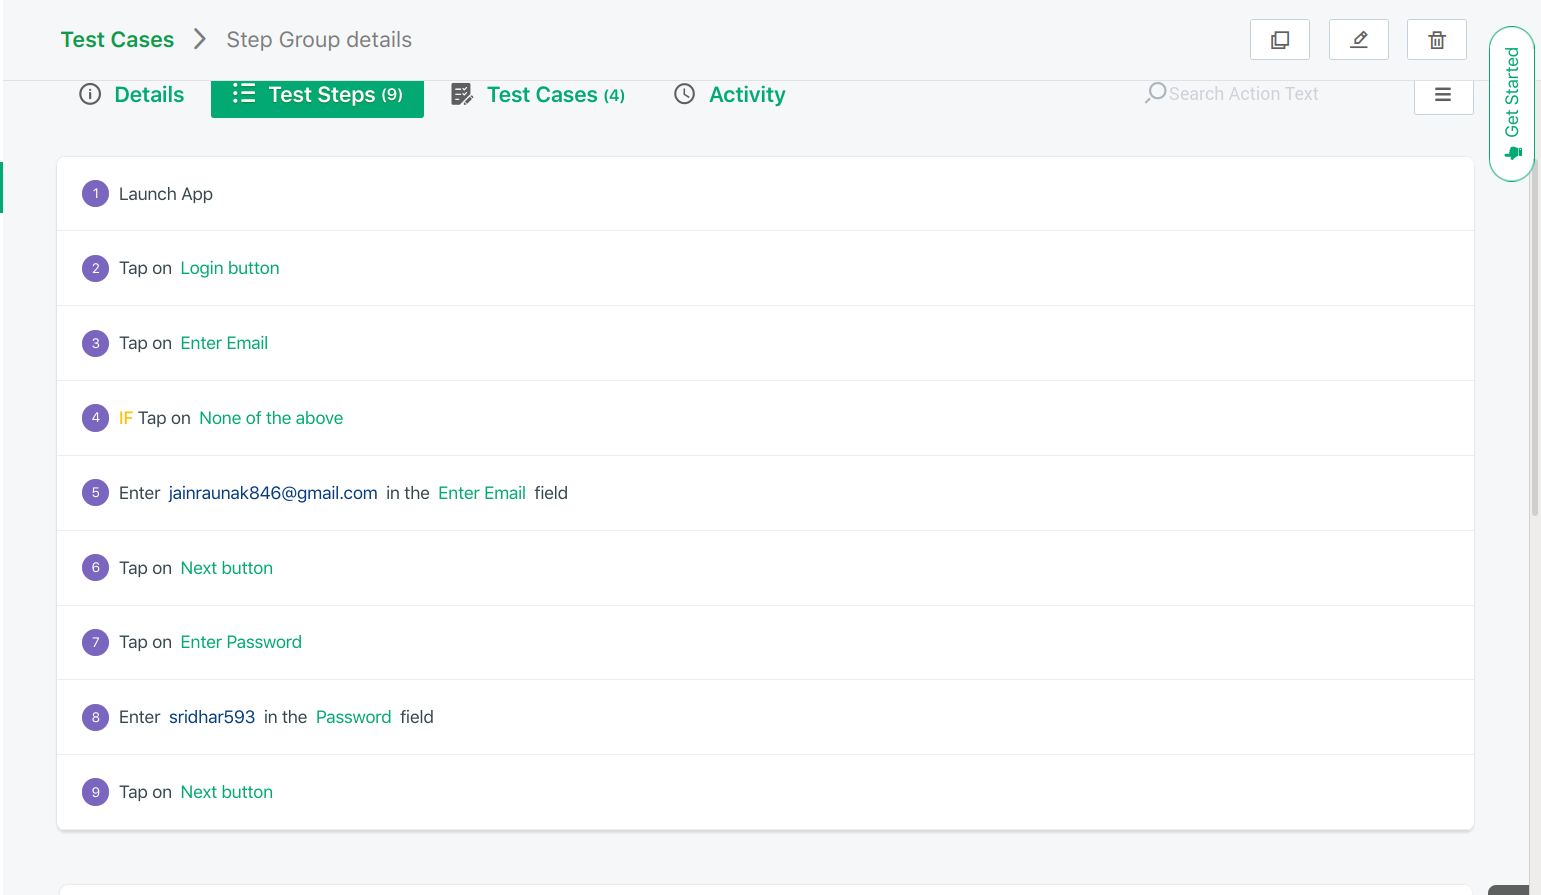
- Similarly, we can create multiple Test Steps. Here is a list of all the Test Steps that we have created to test the Login step.
Uploading the App for Testing
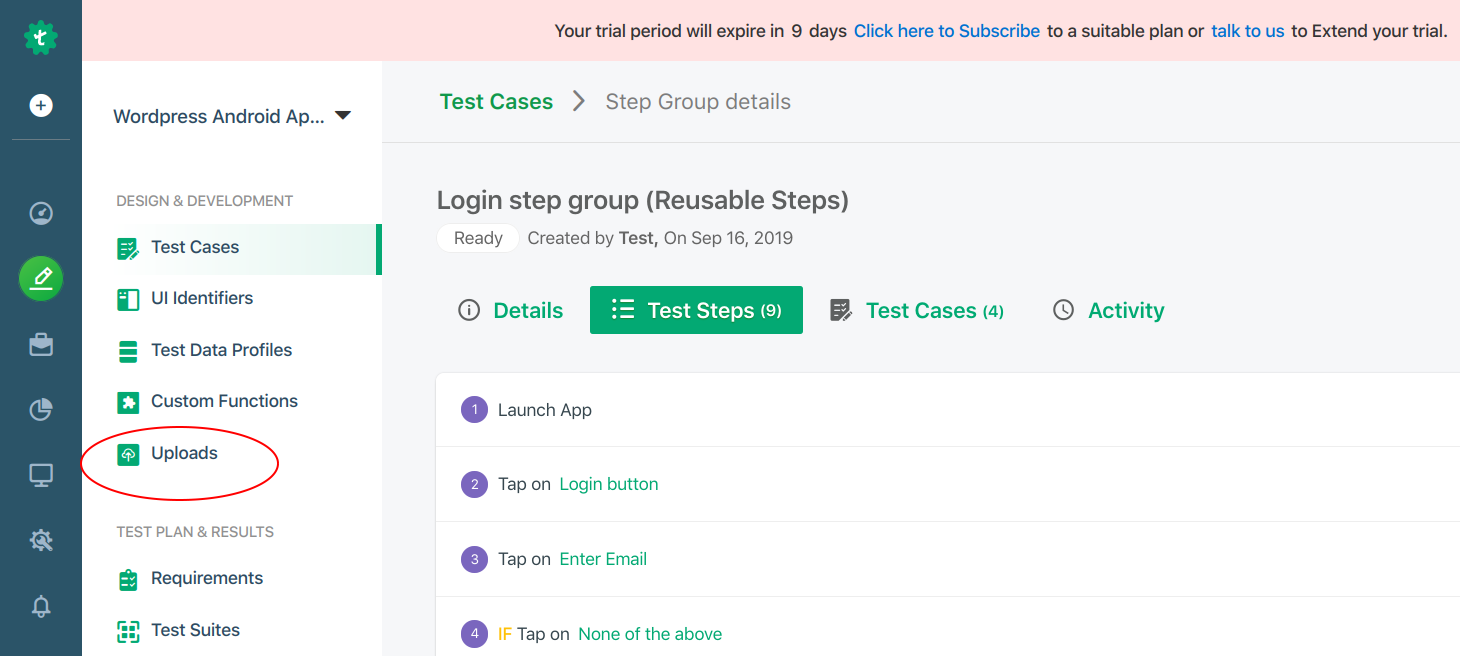
You need to upload the App on which you would like to perform the Testing. You can upload the .apk file of the Application. Click on the Uploads button inside the Test Development part of the left Context Menu.
Here, click on the upload button and you will be directed to a screen where you will be asked to fill in some details.
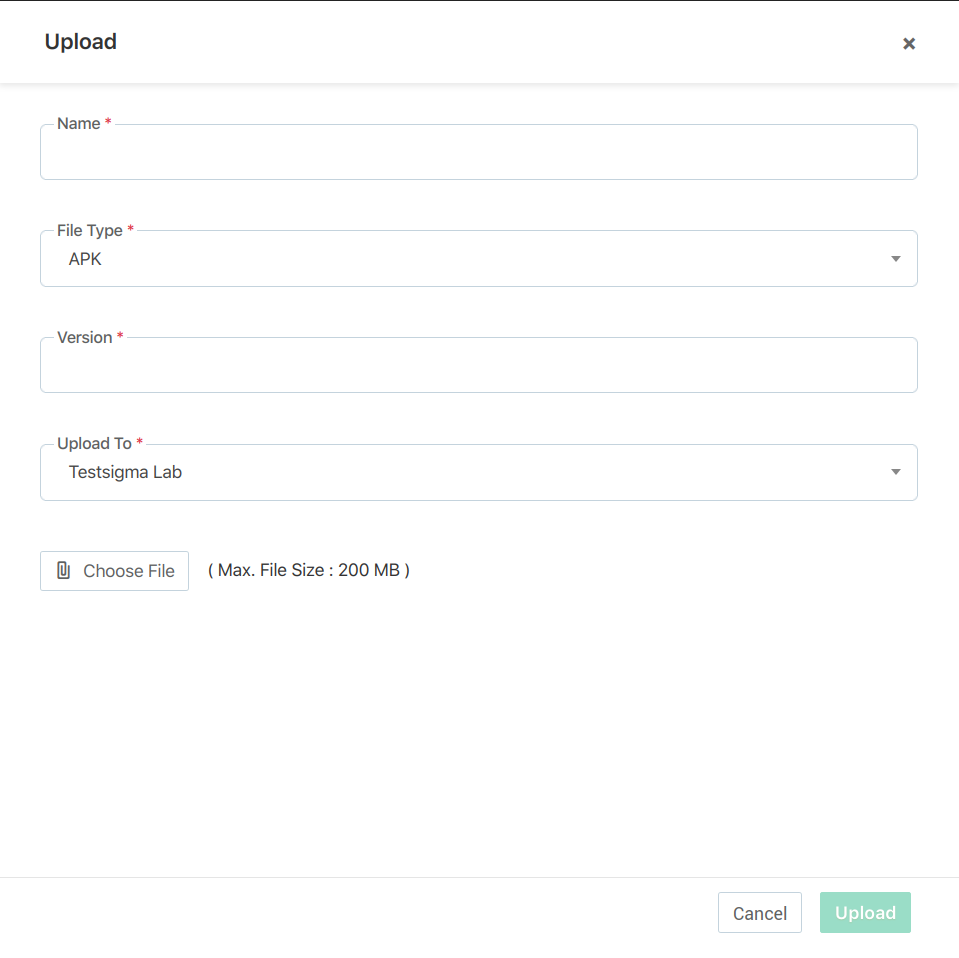
Enter the name of the application, the type, and the version. Upload the .apk file of the application and create it on the Upload button.
Creating and Running the Execution
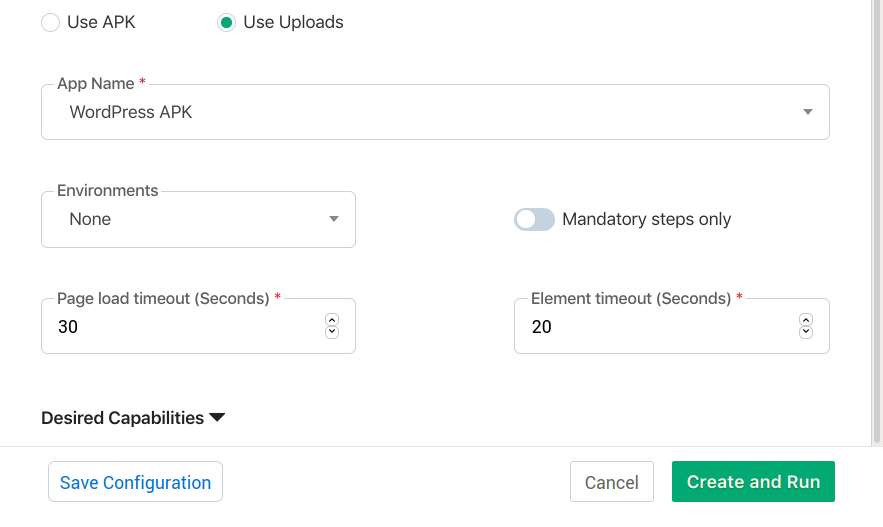
After you have uploaded the .apk file, go back to the Test Cases Page where you created your Test Case. Click on the Run Test Case button.

You will be asked to enter some details.

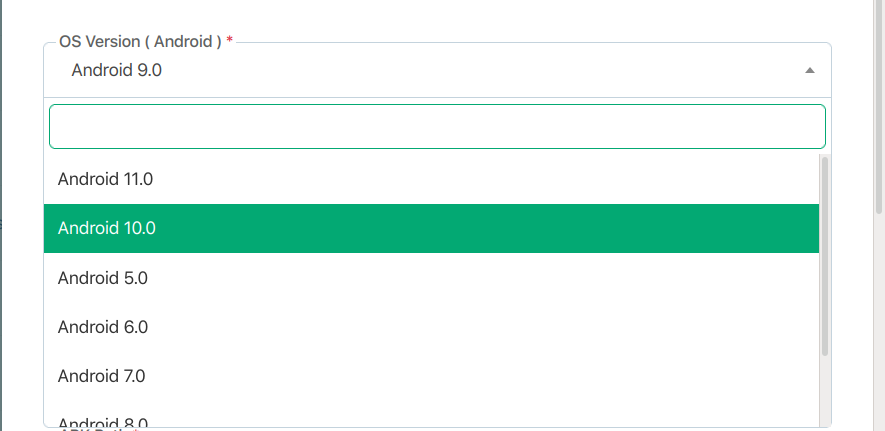
Here, you will have to enter the Name, Test Lab Type, OS Version and other details. You will notice that some input fields are automatically filled in such as the name, Test Lab Type, etc.
The OS Version and the Device are automatically filled with the latest versions. By default, Screenshots are captured only for failed steps. You can configure this to take screenshots for all or mandatory steps.
TestSigma provides a plethora of Android Versions and Devices for you to perform testing on all kinds of Screen Dimensions.
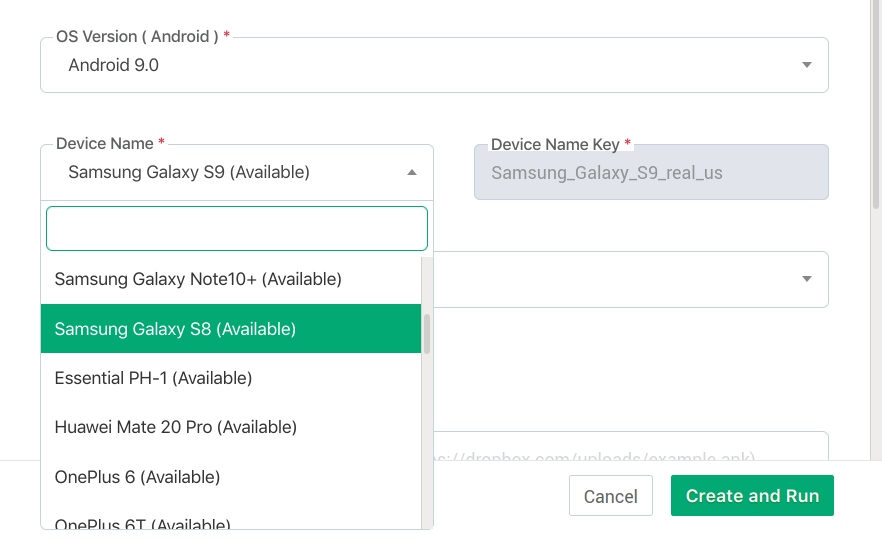
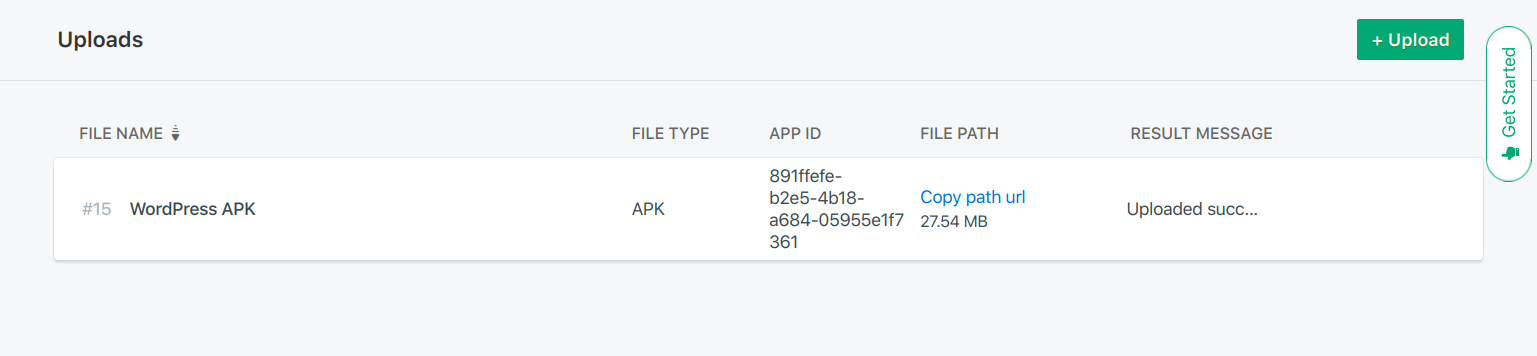
Choose the “Use Uploads” button to see the list of .apk files that you have uploaded earlier and use the appropriate one for your testing. After configuring all the required fields, click on the create and run button.
Analyzing the Reports
After you successfully run your Test Cases, you can perform a deep-down drill on your Test Results.
A complete Report with the screenshots of all the steps and the number of passed and failed Test Cases will be generated for you to perform enhanced debugging on your mobile application.

With the increasing usage of handheld devices (mobile and tablets), it has become very essential to create applications that provide a seamless UI experience to the users. To achieve this, you need to perform enhanced testing on multiple screen dimensions to ensure the responsiveness of your application. It’s obvious that testing mobile applications on multiple screen sizes are a very hefty task.
TestSigma provides you with numerous features and tools to perform mobile application testing by allowing you to perform Testing on 2000+ iOS and Android devices all packed within a single tool.
It allows you to create test cases using simple natural language, thus providing an escape route where you don’t need to get into those confusing selenium codes. It’s a next-generation tool allowing you to save time and resources while you are performing enhanced Mobile Application Testing.
Еще об этом:
 Manual Testing Interview Questions and Answers
Types of Testing | Software Testing Types Every QA Should Know
Regression Testing With Testsigma
Cross-browser Testing with TestSigma
Testsigma introduction
Mobile App Testing – The Complete Guide with Checklist
API Testing with TestSigma
Web Application Testing – Complete Website Testing Guide
Banking Domain Application Testing
Data Driven Testing with TestSigma
Manual Testing Interview Questions and Answers
Types of Testing | Software Testing Types Every QA Should Know
Regression Testing With Testsigma
Cross-browser Testing with TestSigma
Testsigma introduction
Mobile App Testing – The Complete Guide with Checklist
API Testing with TestSigma
Web Application Testing – Complete Website Testing Guide
Banking Domain Application Testing
Data Driven Testing with TestSigma