
Test case creation in manual mode
In this tutorial, we are going to learn, test script creation using Katalon Studio’s manual mode. As stated in our previous tutorials, Katalon studio inherently supports Keyword-driven framework. Katalon has a rich set of keywords or we can say commands to help in test case creation for users with limited programming knowledge. Users can directly use these keywords to simulate some user actions like opening a browser or to perform some tasks like validating if the expected and actual results are the same. Let’s first see some commonly used keywords provided by Katalon Studio for automating a web application.
Content
Browser related keywords
| Keyword | Description |
|---|---|
| Open Browser | Opens browser with the URL provided, if no URL is provided then it will just open a blank browser. |
| Close Browser | Closes a browser. |
| Navigate to Url | Navigates to a url provided in the Input cell. |
| Delete All Cookies | Deletes browser cookies. |
| Wait For Page Load | Waits for page to load with the timeout value in seconds. |
| Refresh | Refreshes the browser. |
| Back | Goes back to the previous URL in the browser history. |
| Forward | Goes to the next URL in the browser history. |
Web element related keywords
| Keyword | Description |
|---|---|
| Click | Simulates mouse left-click on a web element. |
| Double Click | Simulates mouse double-click on a web element. |
| Right Click | Right clicks on a web element. |
| Check | Checks a check-box or radio button. |
| Un-check | Unchecks a check-box or radio button. |
| Set Text | Writes a text on a textbox or any input field (similar to sendKeys() in selenium) |
| Select Option By Index | Selects a dropdown option by its index. |
| Select Option By Label | Selects a dropdown option by its visible text. |
| Select Option By Value | Selects a dropdown option by its value. |
Common wait related keywords
| Keyword | Description |
|---|---|
| Wait For Element Clickable | Waits for an element to be clickable with timeout value in seconds. |
| Wait For Element Visible | Waits for an element to be visible with timeout value in seconds. |
| Wait For Element Not Visible | Waits till an element is not visible. |
Commonly used validation related keywords
| Keyword | Description |
|---|---|
| Verify Element Present | Returns a boolean value of true/false based on the presence of an element. |
| Verify Element Not Present | Returns a boolean value of true/false based on the absence of an element. |
| Verify Element Text | Return true if the element’s text is the same as expected text else false. |
| Verify Equal | Return true if the actual value is the same as the expected value. |
| Verify Not Equal | Return false if the actual value is the same as the expected value. |
Other commonly used keywords
| Keyword | Description |
|---|---|
| Accept Alert | Simulates user action of accepting an alert or clicking ‘Ok’ on an alert dialog box. |
| Dismiss Alert | Simulates user action of dismissing an alert or clicking ‘Cancel’ on an alert dialog box. |
| Get Attribute | Used to get a particular attribute of a web element e.g. name, type etc. |
| Get Text | Used to get the element text. |
| Drag And Drop To Object | Simulates drag and drop action. |
| Switch To Frame | Switches to a particular iframe. |
| Switch To Window Title | Switches to a particular window with the given title. |
| Close Window Title | Return false if the actual value is same as expected value. |
| Switch To Default Content | Switches to the parent window, called after performing some function on an iframe or a different window/tab. |
| Take Screenshot | Takes a screenshot of the browser when called. |
| Execute JavaScript | Used to execute javascript command. |
| Upload File | Used to perform file upload operation on a file type element. |
Now, let’s begin with a test script creation using Katalon’s manual mode. In this demo, we will create a test that checks Google calculator functionality.
Let’s first quickly see, how to create a project in Katalon.
- On the Katalon Studio IDE, go to the File menu and click on New->Project.
- Name your Project, specify the project location, provide a description(optional) and click OK. Now, the “Test Explorer” on the left-hand side will get populated with pre-defined packages like ‘Test Cases’, ‘Object Repository’, ‘Test Suites’, ‘Data Files’ etc.
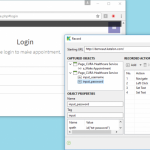
- Next, we need to create a test case. For this, right-click on ‘Test Cases’, click on the New button on the toolbar and select Test Case. Name your test case – ‘GoogleCalc’, provide a description and click OK. If everything is fine, the following screen will be displayed.

Now that we know, how to create a project on Katalon, let’s focus on the test case creation part. We can create tests in the Manual mode by adding keyword using Add button. For keywords related to web application automation, click on the arrow icon in the Add button and select Web UI Keyword option.

When dealing with web elements we need to capture or locate the elements. For this, we can use Spy Web feature. Clicking the Spy Web option launches an Object Spy window where we can pass the URL of the application. After passing the URL and clicking Start link, the browser launches with the given URL. Now we can hover over any element and pressing Alt+` will save the object in the object repository.

Google calculator test in manual mode
- Select Open browser from the Web UI Keyword, leaving the Input cell blank, in order to launch a browser.
- For opening a URL, select Navigate To URL keyword with the exact URL in the Input cell – https://google.com.
- Now, using object spy, capture the locator for the google search box.
- For writing into the search box, select Set Text option, in the Object cell enter the name of the object captured (you can also drag and drop the object from the Object Repository into the Object cell). The arithmetic operation e.g. 2+2 will be entered in the Input cell.
- Next, add a Click keyword on the Google Search button(Google search button present in the auto-suggestion for 2+2).

Now we just need to add an Assertion or validation point which checks that the result of 2+2 is getting correctly calculated as ‘4’. For this, we will use “Validate element text” keyword. Now, double-click Input cell corresponding to “Verify Element Text” action and enter ‘4’ in the ‘Value’ cell.

- For closing the browser, select the Close Browser keyword.
This completes the test script creation part. Now, we can execute our test script by clicking the ‘Run’ button. You can see the test steps getting executed in the selected browser and the result of the test as passed. Also, you can change the expected value to ‘5’ instead of the correct value ‘4’ and run the test to see it getting failed.
This concludes our post on test script creation using manual mode feature. In the next tutorial, we will study the creation of test script in script mode of Katalon Studio.
Еще об этом:
 Test case creation in script mode
Manual Testing Interview Questions and Answers
What is a Test Case? How to write test cases?
Record and Playback in Katalon Studio
Rest API testing using Katalon Studio
Katalon Studio Best record and playback alternative to Selenium IDE
Types of Testing | Software Testing Types Every QA Should Know
Test case creation in script mode
Manual Testing Interview Questions and Answers
What is a Test Case? How to write test cases?
Record and Playback in Katalon Studio
Rest API testing using Katalon Studio
Katalon Studio Best record and playback alternative to Selenium IDE
Types of Testing | Software Testing Types Every QA Should Know
 ЧТО ДЕЛАЕТ KATALON STUDIO МОЩНЫМ ПО сравнению с другими фреймворками Selenium
What is Manual Testing?
What is Automation Testing?
ЧТО ДЕЛАЕТ KATALON STUDIO МОЩНЫМ ПО сравнению с другими фреймворками Selenium
What is Manual Testing?
What is Automation Testing?